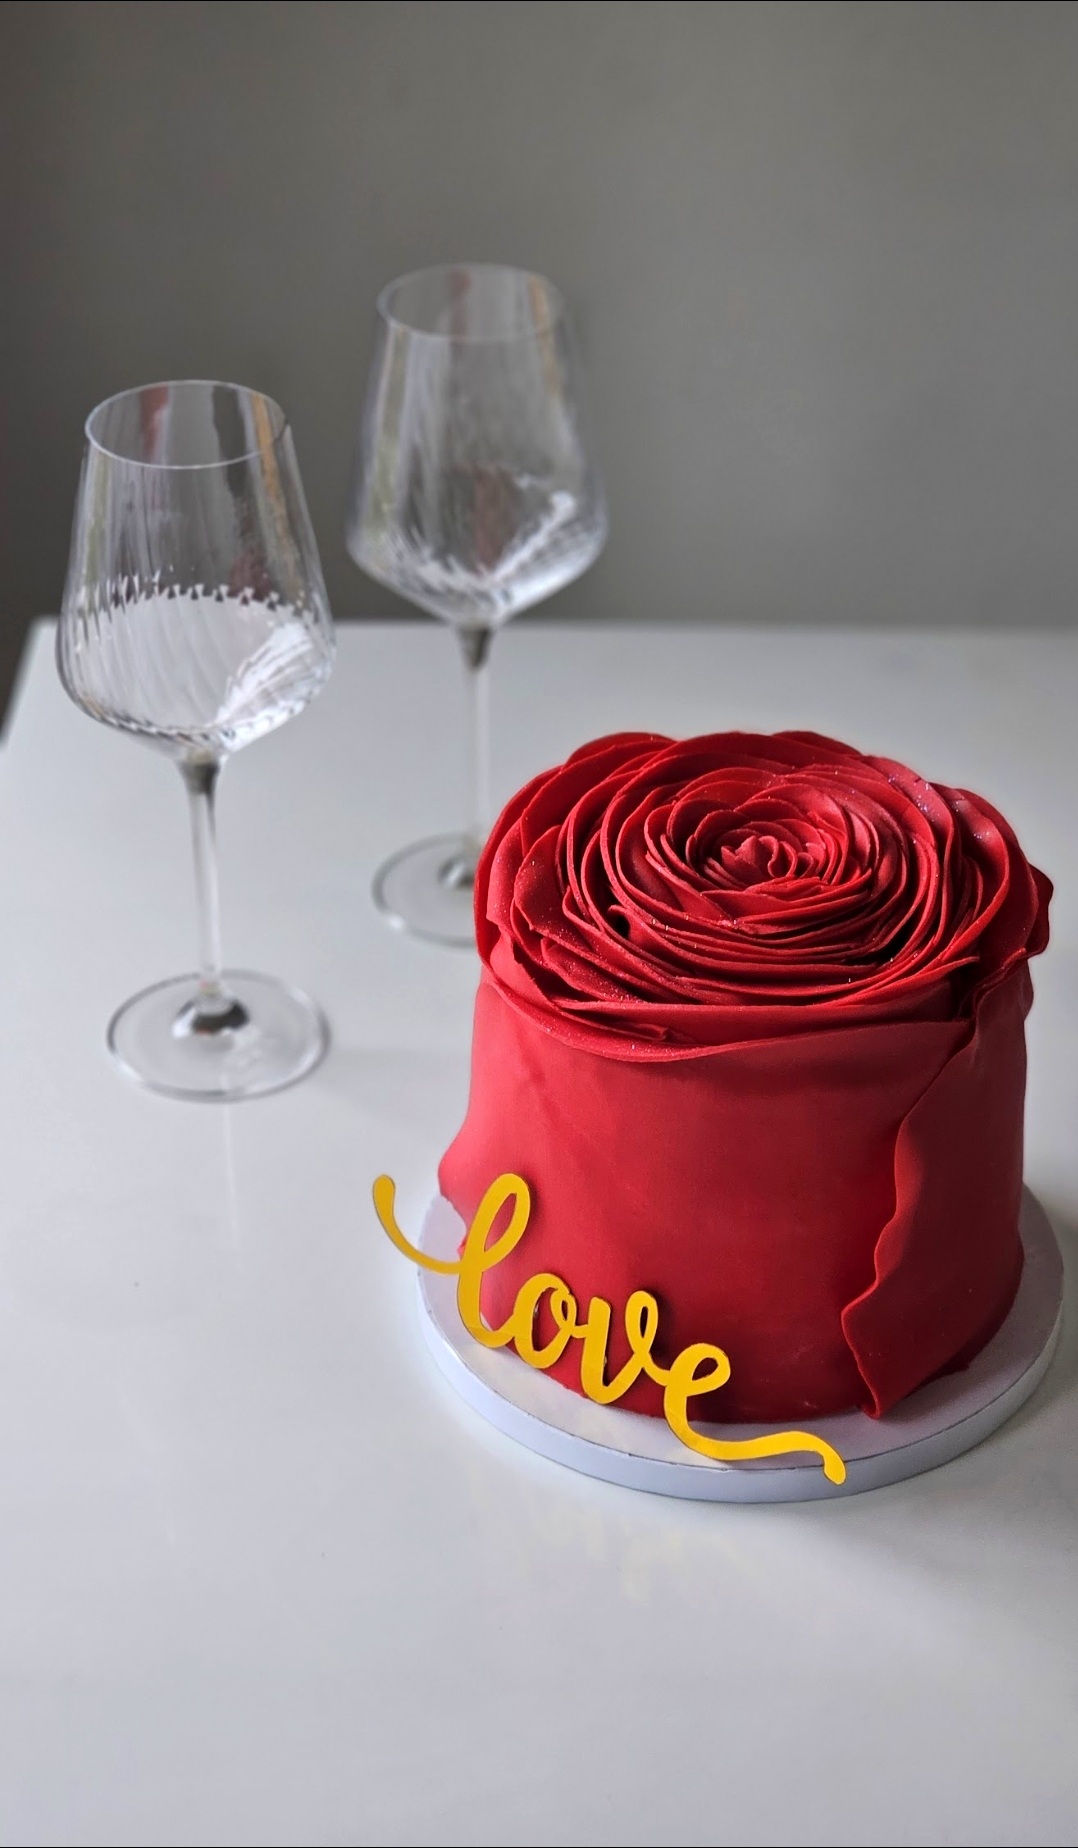
Rose Fondant cake Decoration tutorial
Easy, Elegant, and Absolutely Stunning
This rose cake is the definition of simple elegance. Thin, delicate fondant petals create a beautiful blooming rose right on top of the cake. It looks luxurious, yet it’s surprisingly easy to make with just a few tools and simple steps.
Perfect for birthdays, anniversaries, Valentine’s Day, Mother’s Day, or any moment you want to make extra special. A sweet, elegant gift that always impresses
Easy Step-by-Step Tutorial: How to Make This Rose Decoration
What You Need
- Red fondant or modeling chocolate
- Rolling pin
- Silicone mat
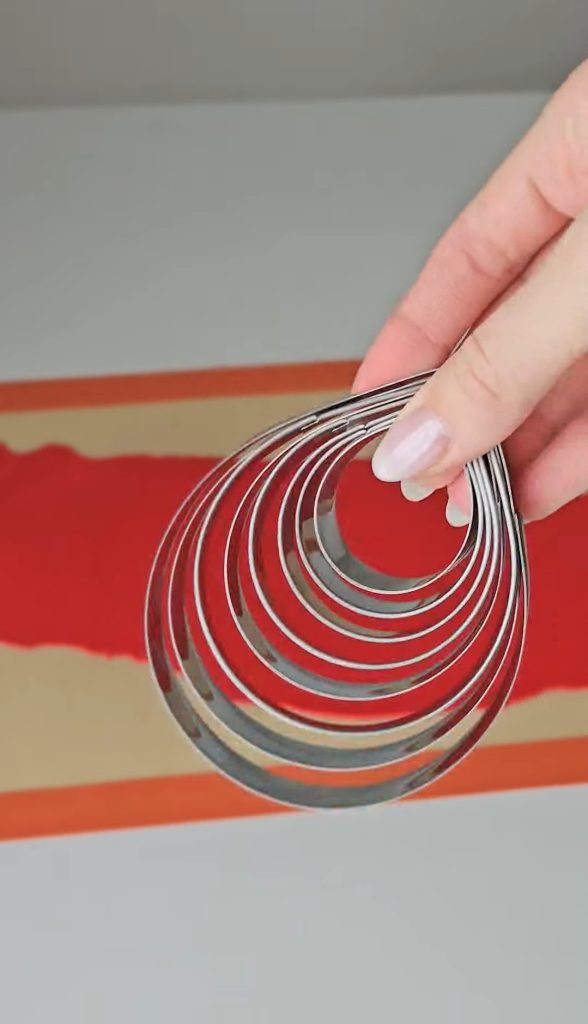
- Circle cookie cutters or teardrop-shape cutters
- Knife or fondant knife
- Small food-safe brush
- A little water (only for glue)
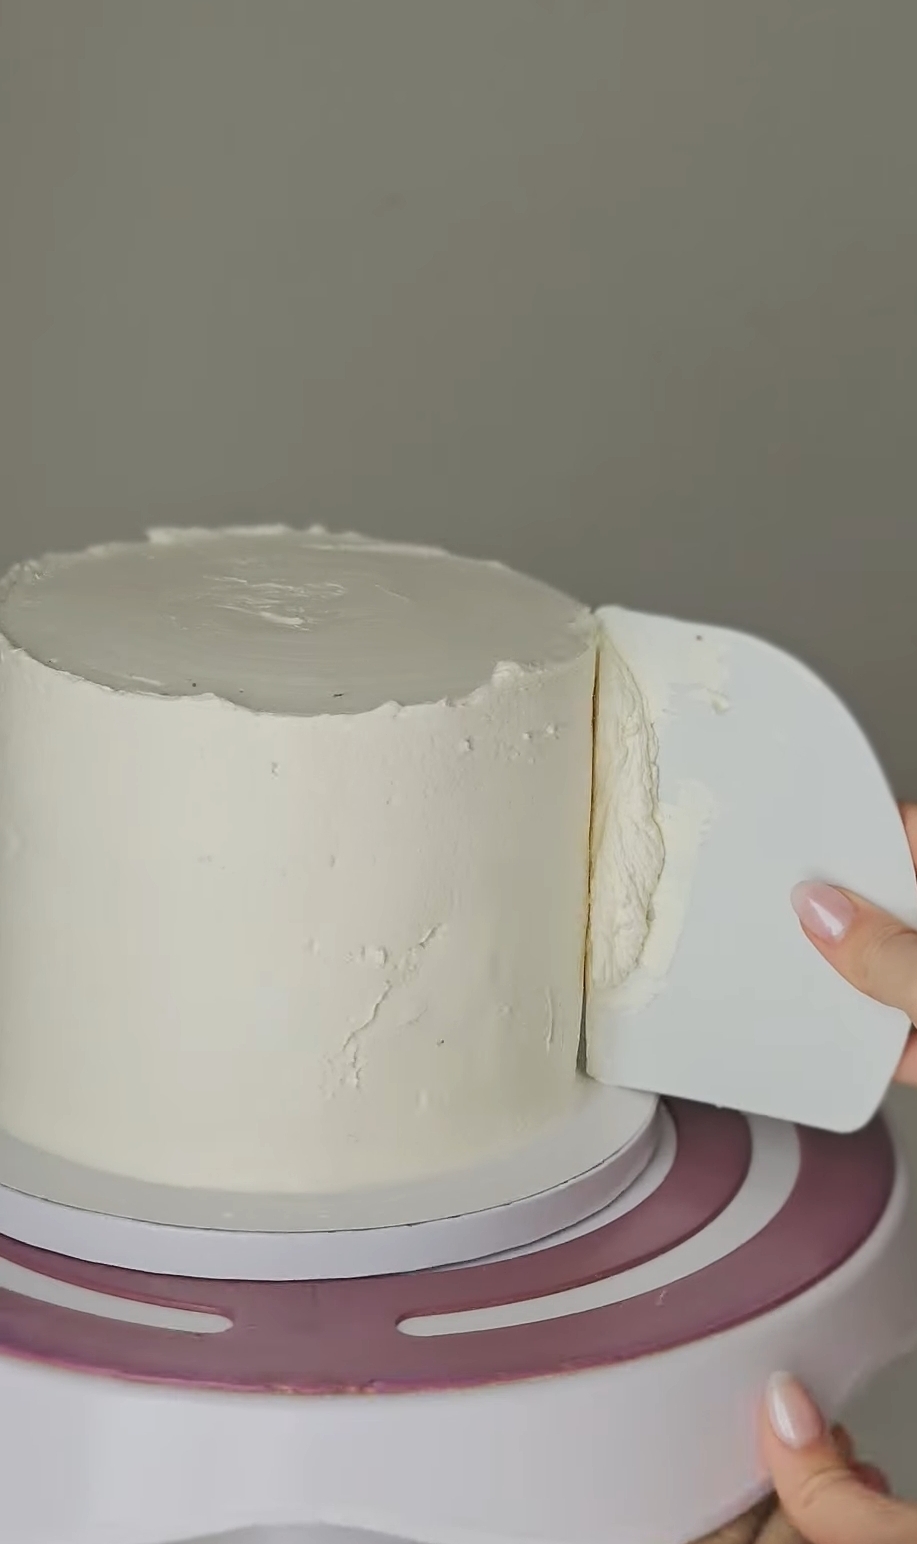
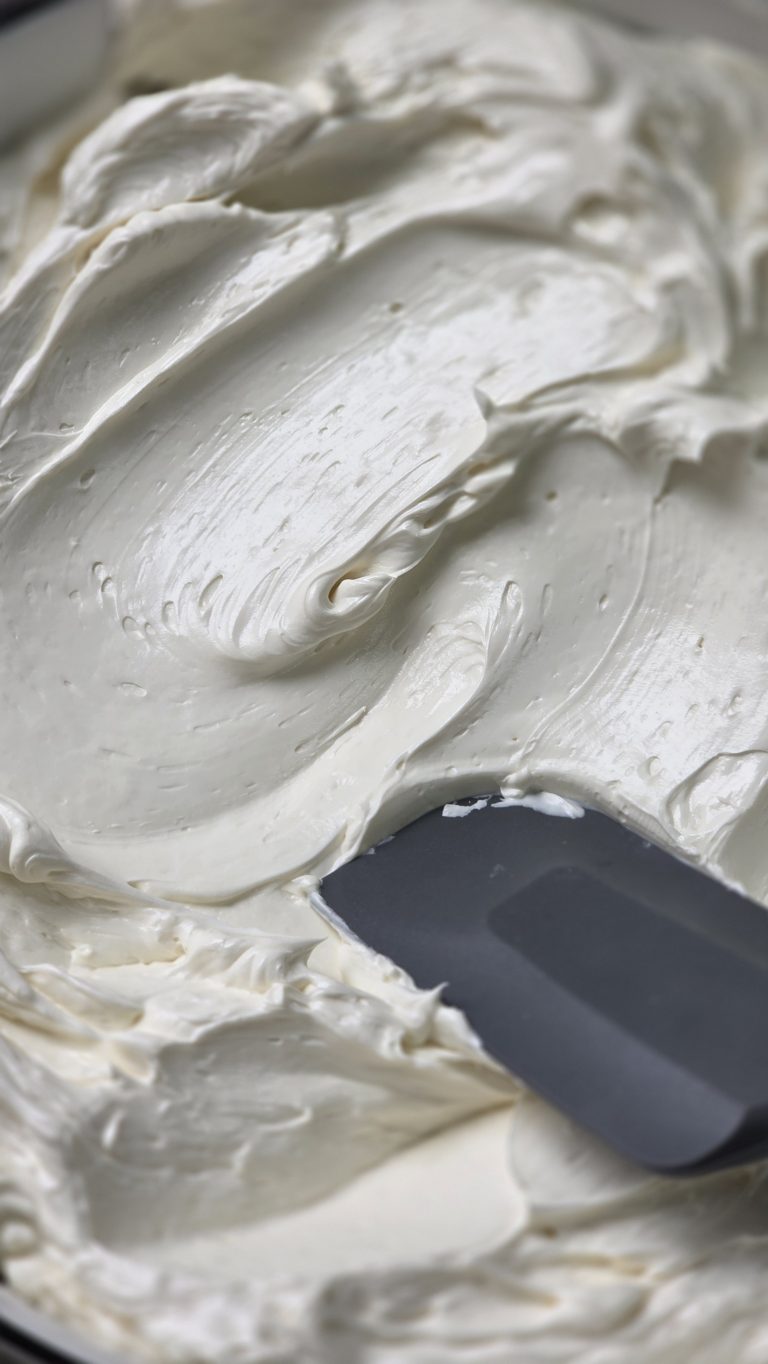
- 6″ cake covered with buttercream or ganache
- Turntable and Cake Stand
- 8″ cake board
Some links in this post are Amazon affiliate links. Thank you for supporting my blog!
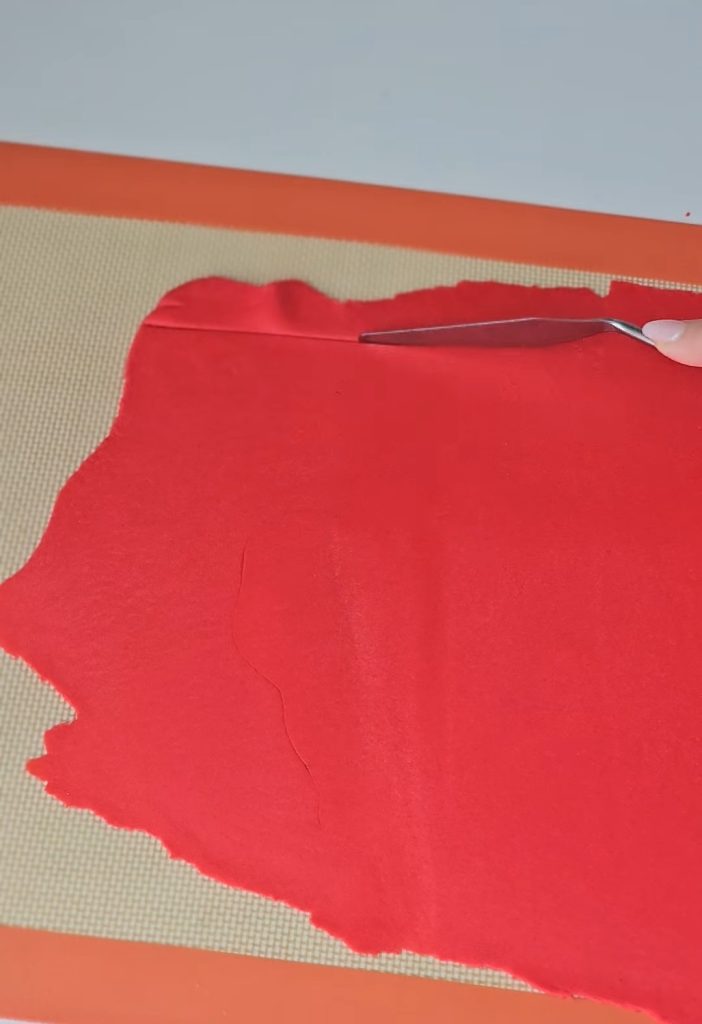
Making the Petals
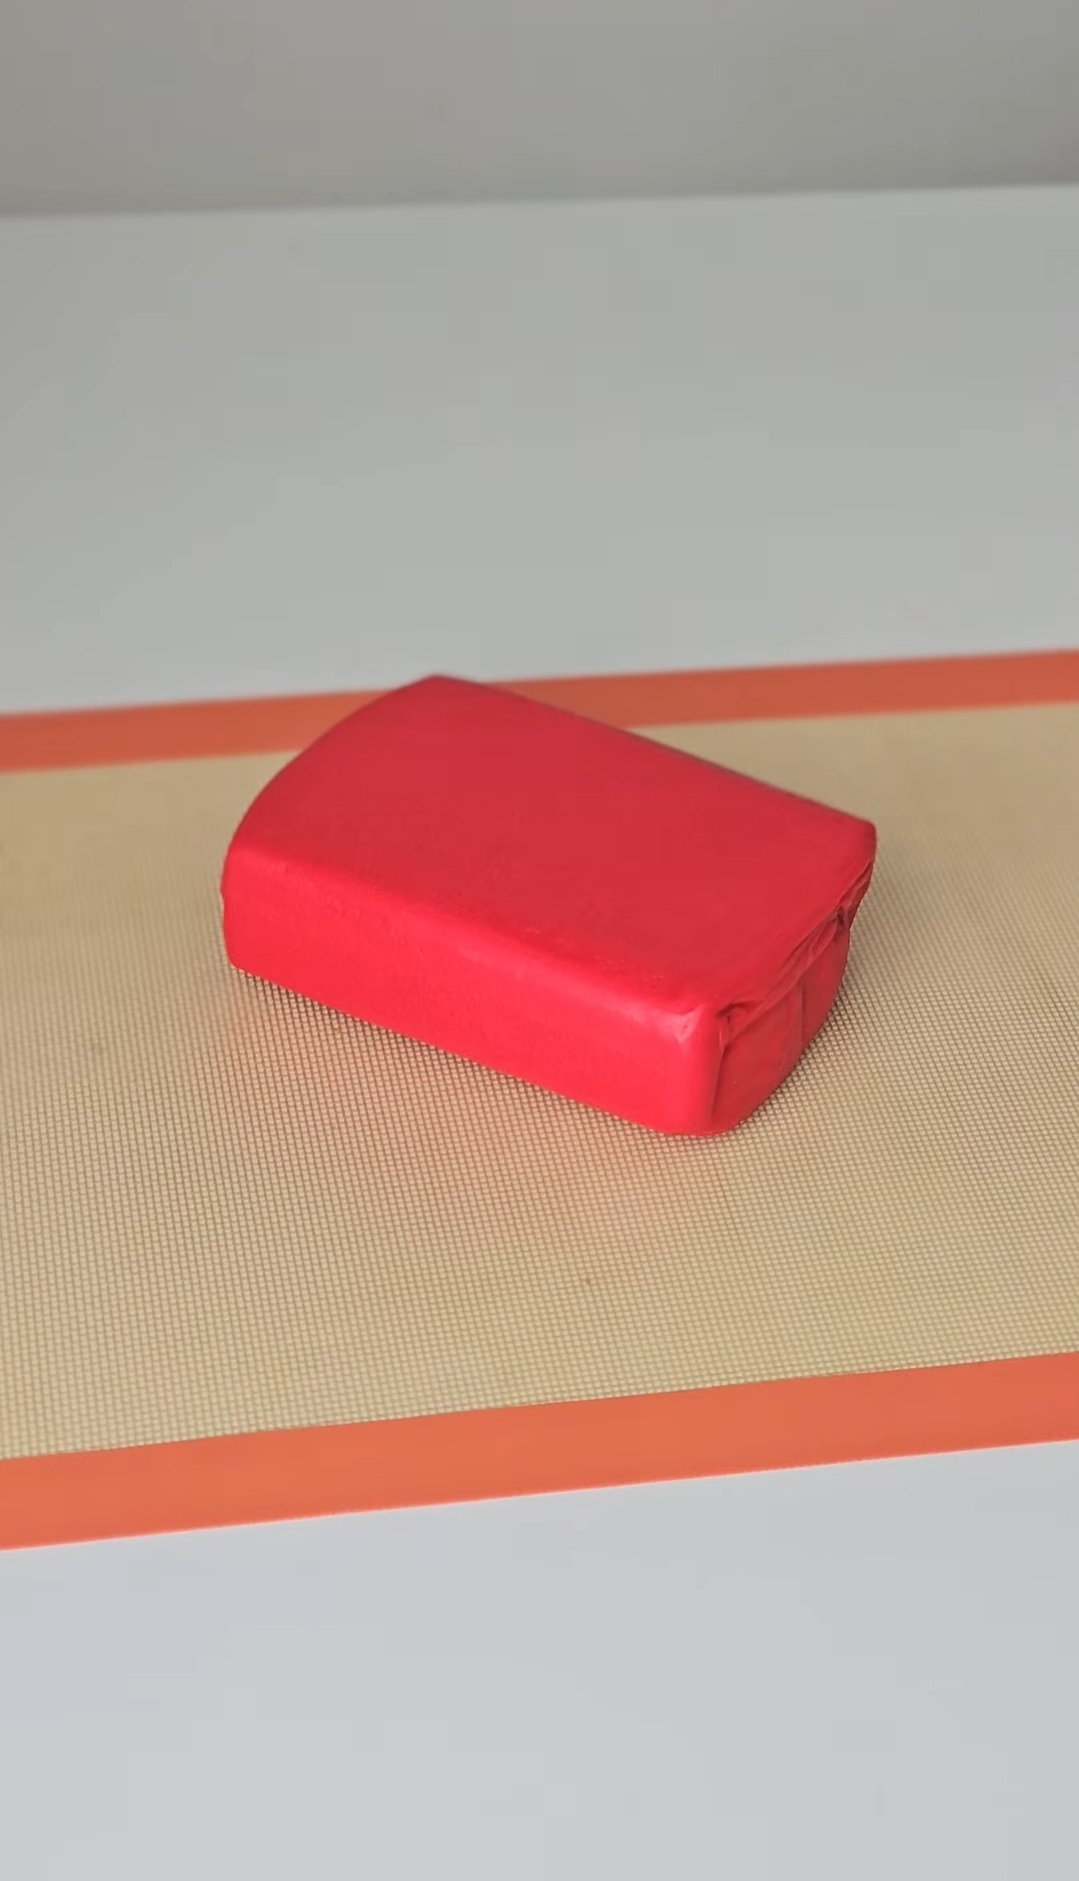
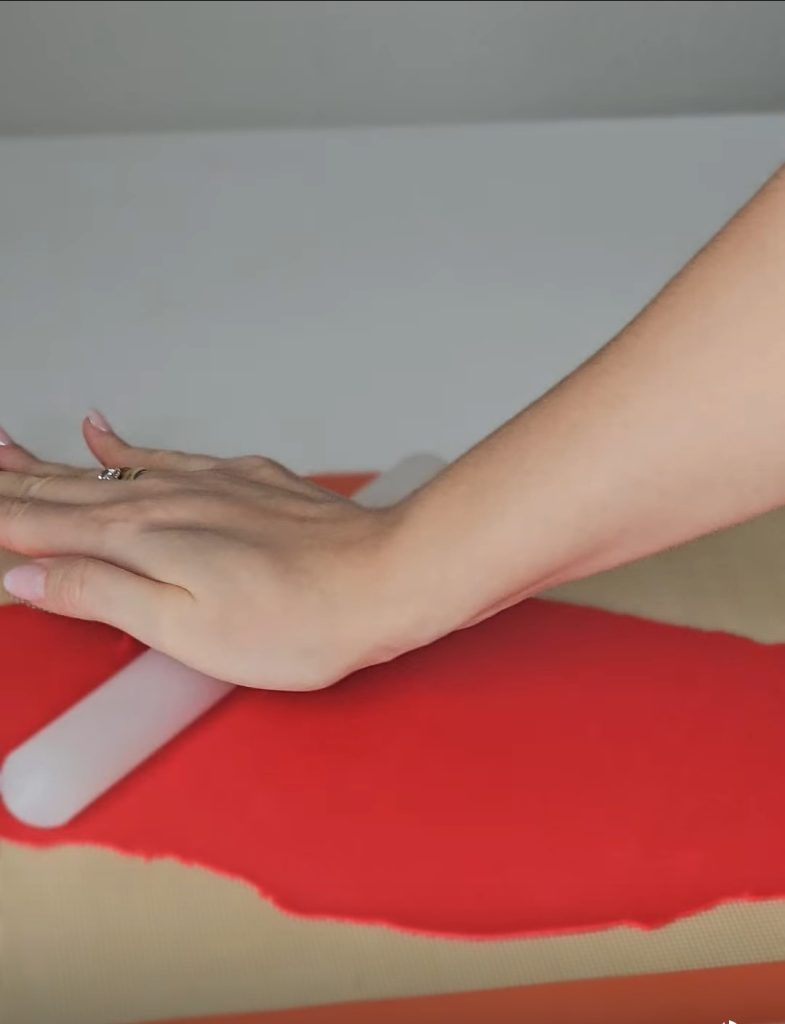
- Knead the fondant until it is soft and smooth.
If it sticks — use a tiny amount of cornstarch on the mat. - Roll it very thin — about 1–2 mm.
- Tip: The thinner the fondant, the more natural petals will look.
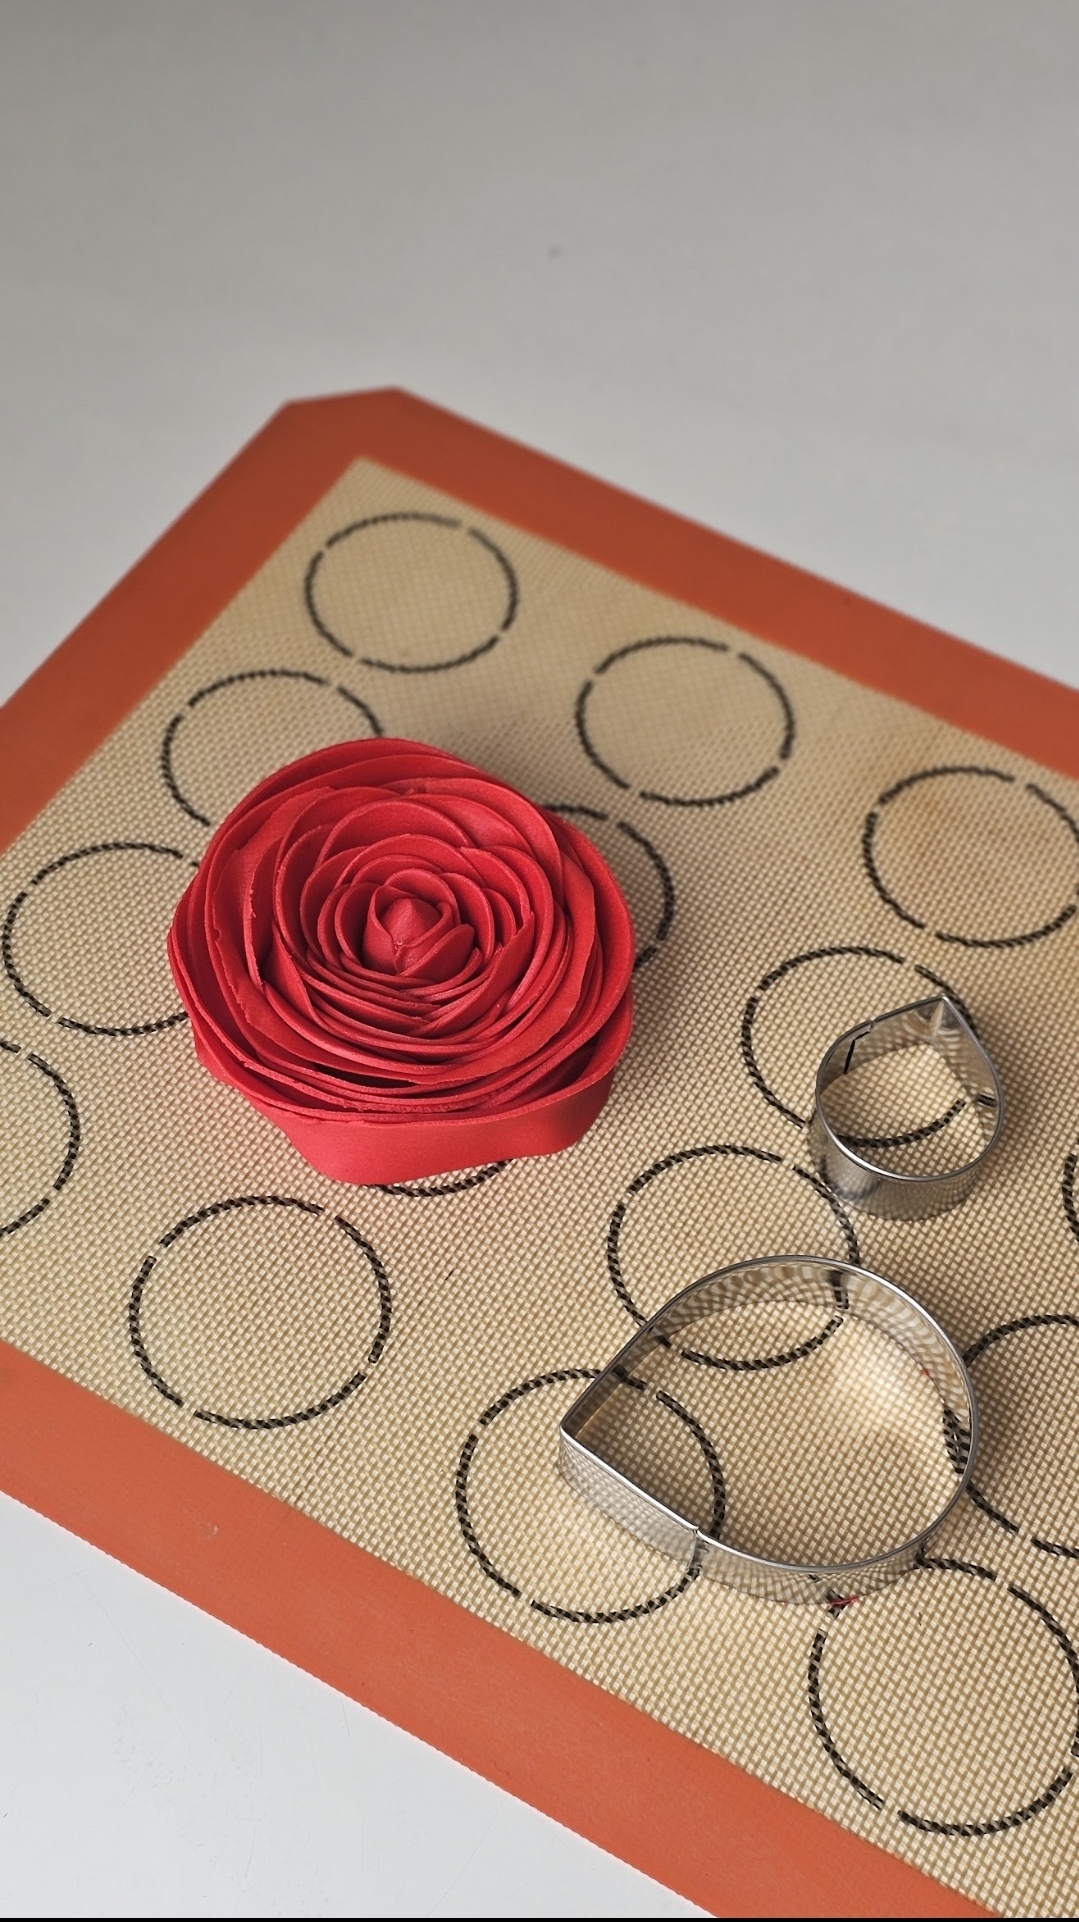
Cut the Petals
- Small circle or teardrop cutters for the center
- Medium cutters for middle petals
- For large outer petals — you can cut them by hand so all petals stay the same height.
Important: - You don’t need perfect shapes — petals can be circles, half-circles, or teardrops.
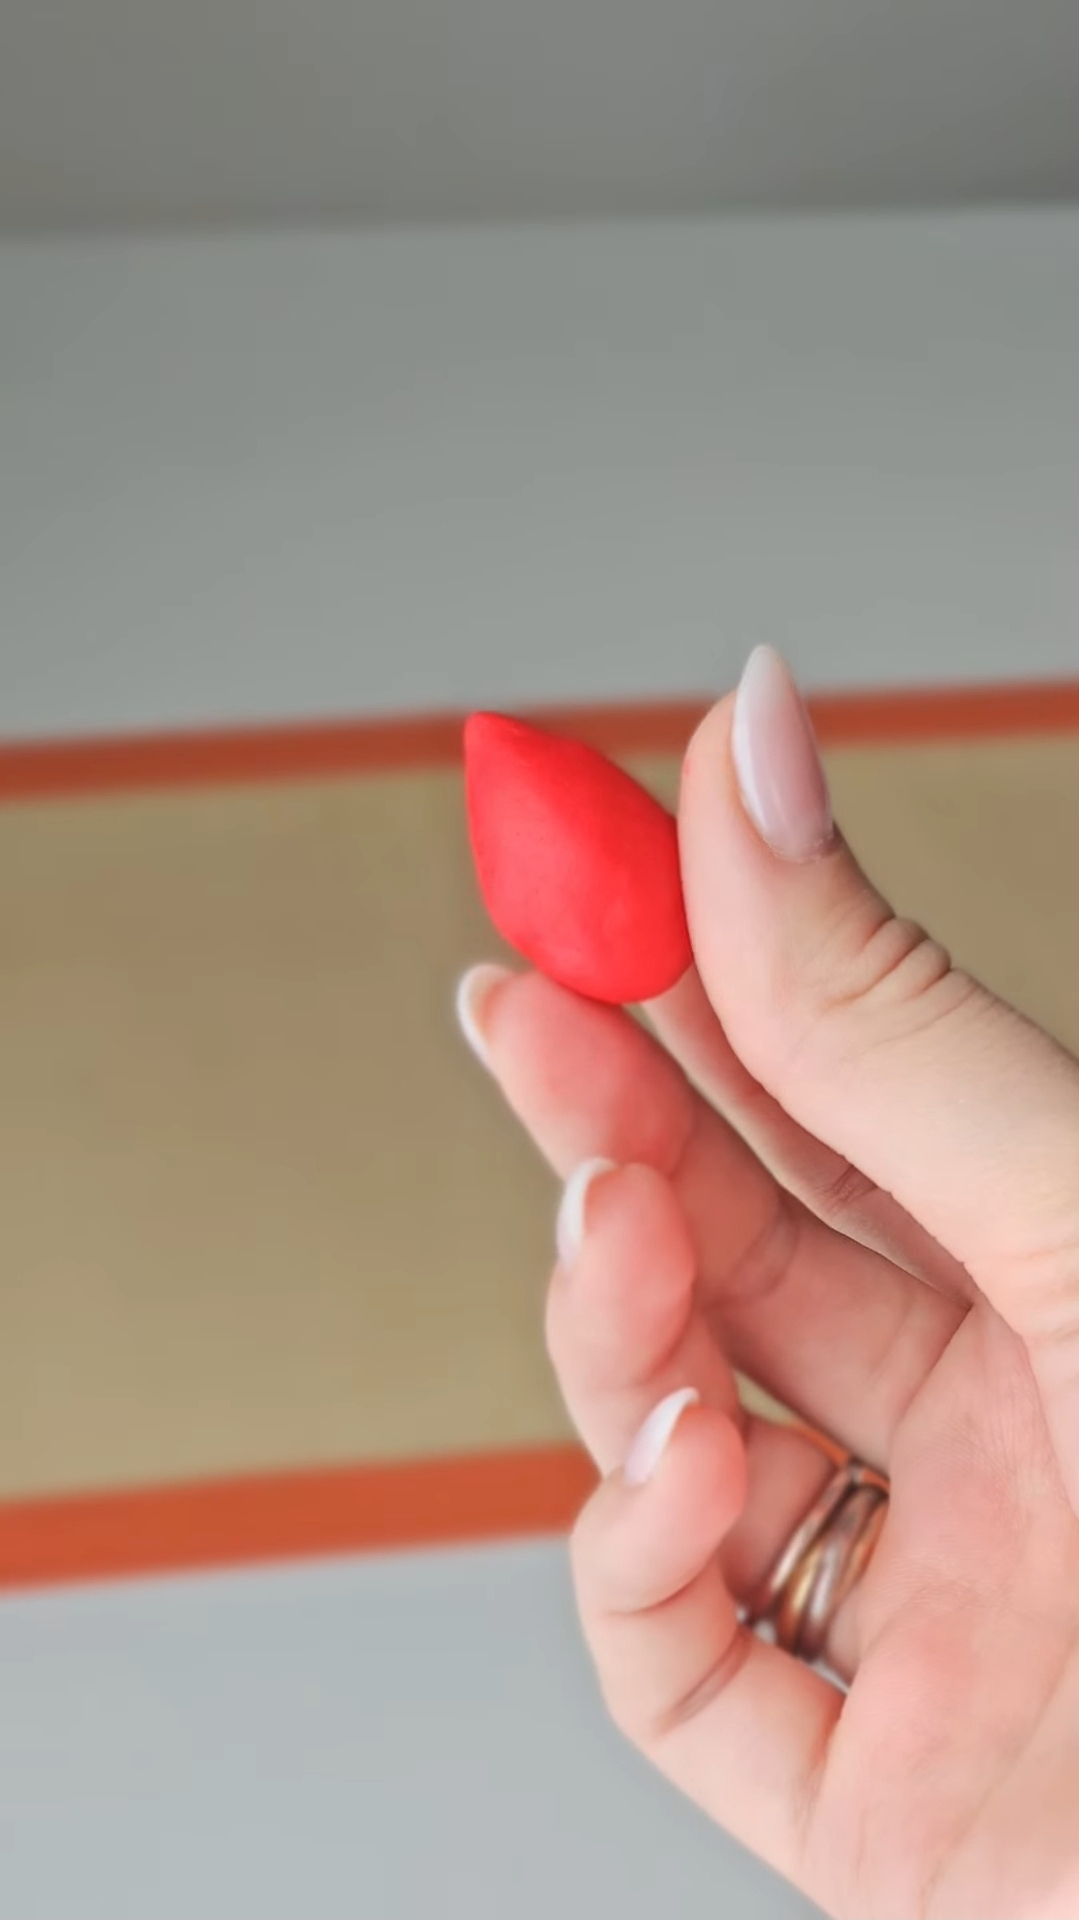
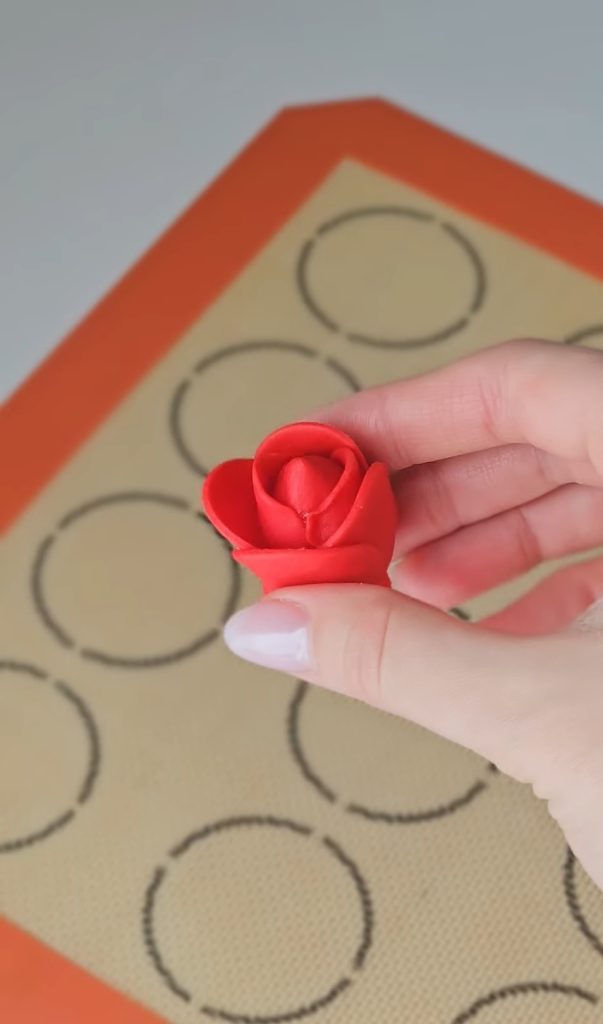
Making the Center Rose
- Roll a tiny ball of fondant.
- This will be the inside of your rose.
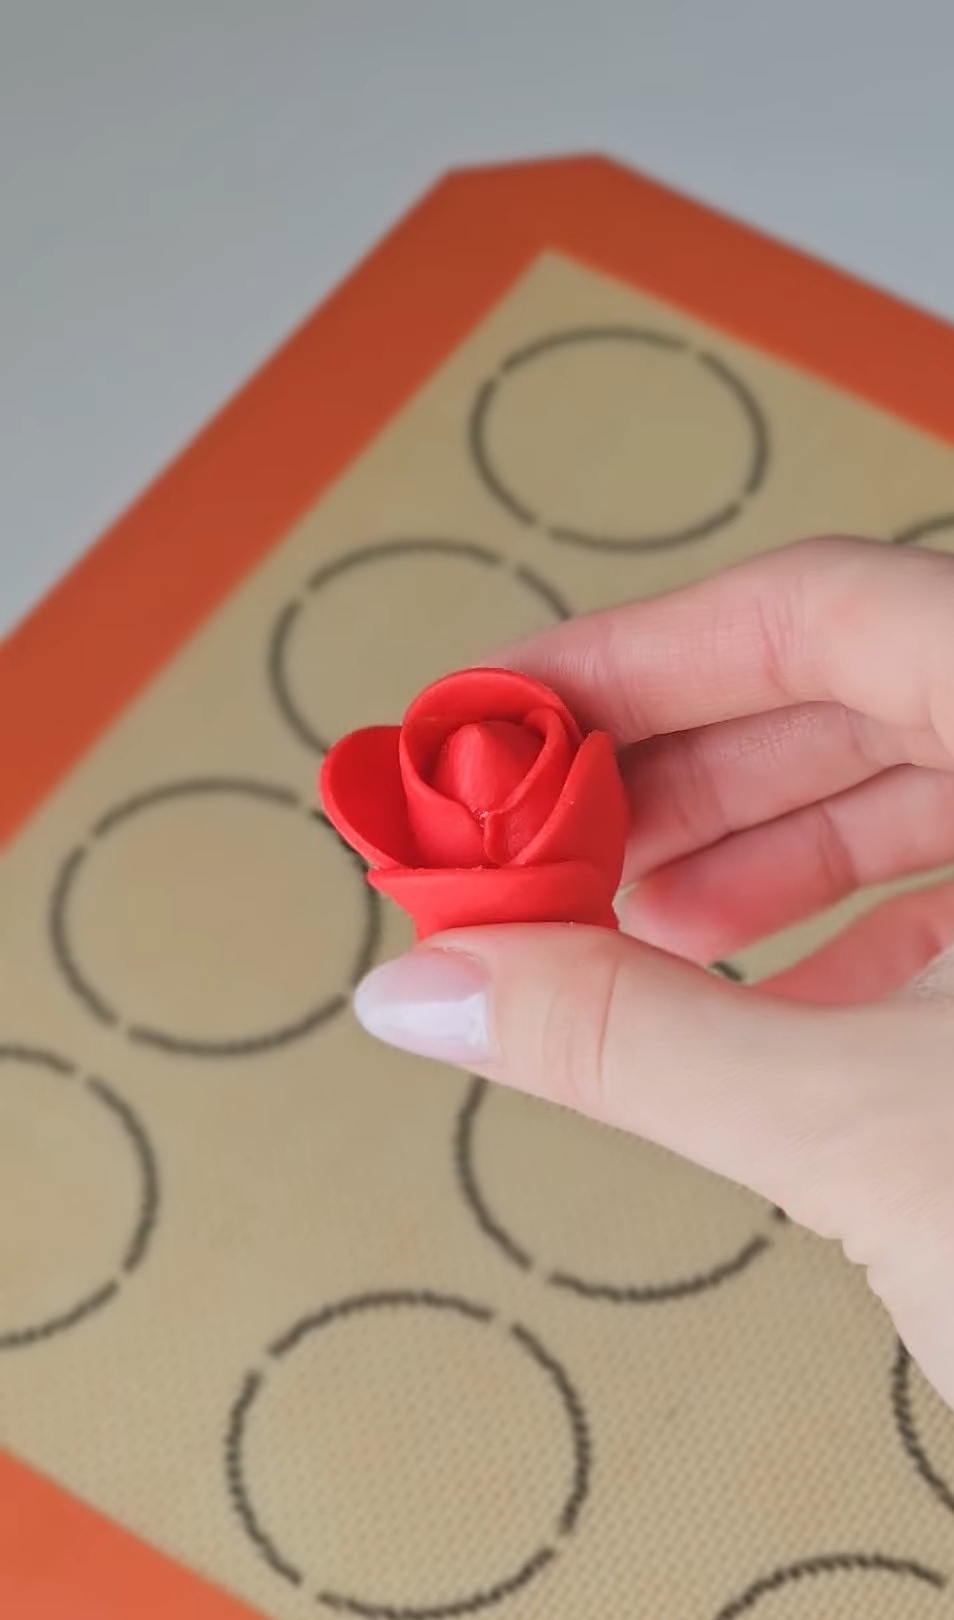
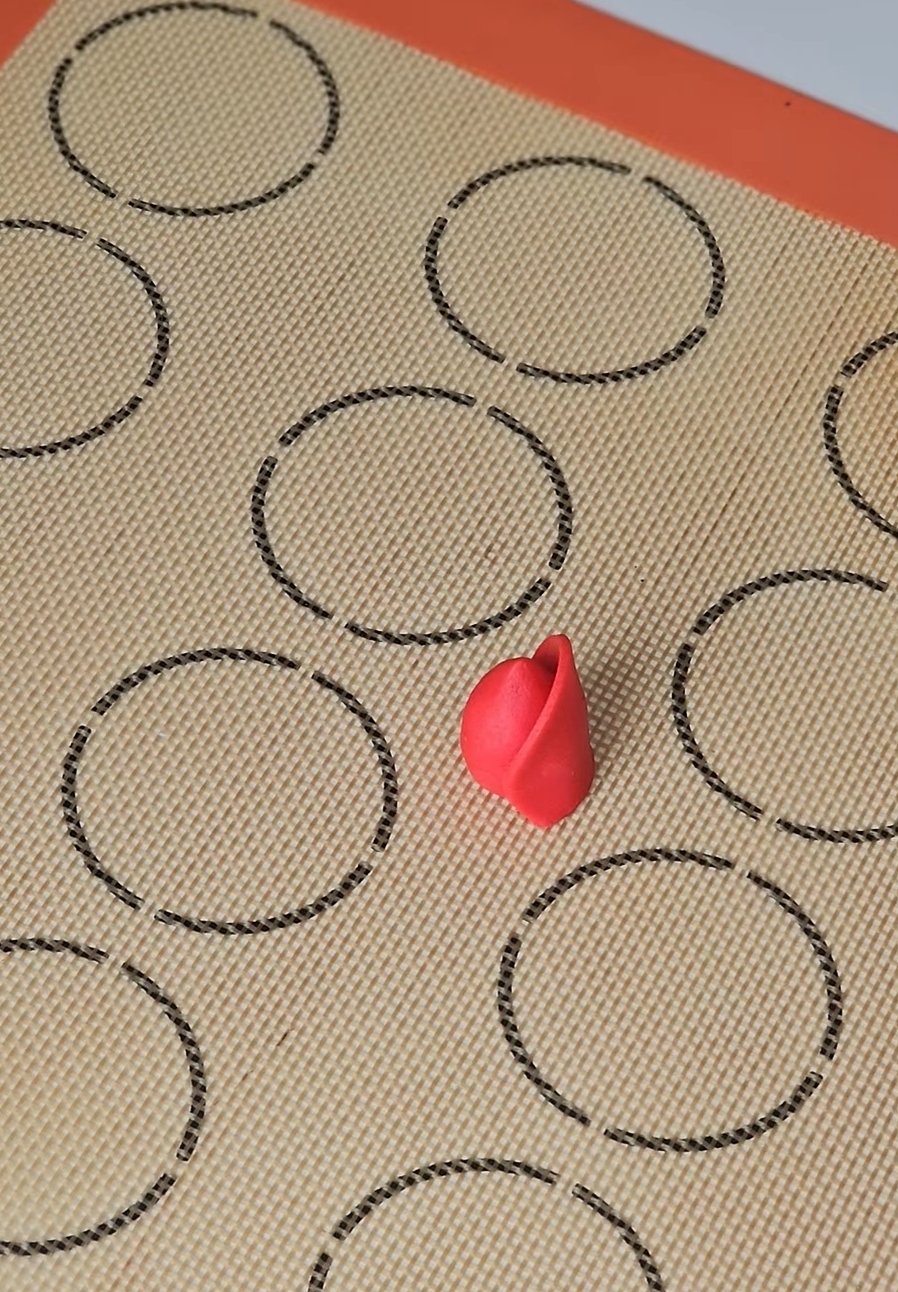
First Petal
- Take one small circle, flatten the edge slightly with your fingers, and wrap it around the ball.
- Use a very small drop of water only at the bottom to glue it.
Add More Small Petals
- Add 2–3 more small petals around the center.
Always overlap slightly. - Now you have the middle of the rose.
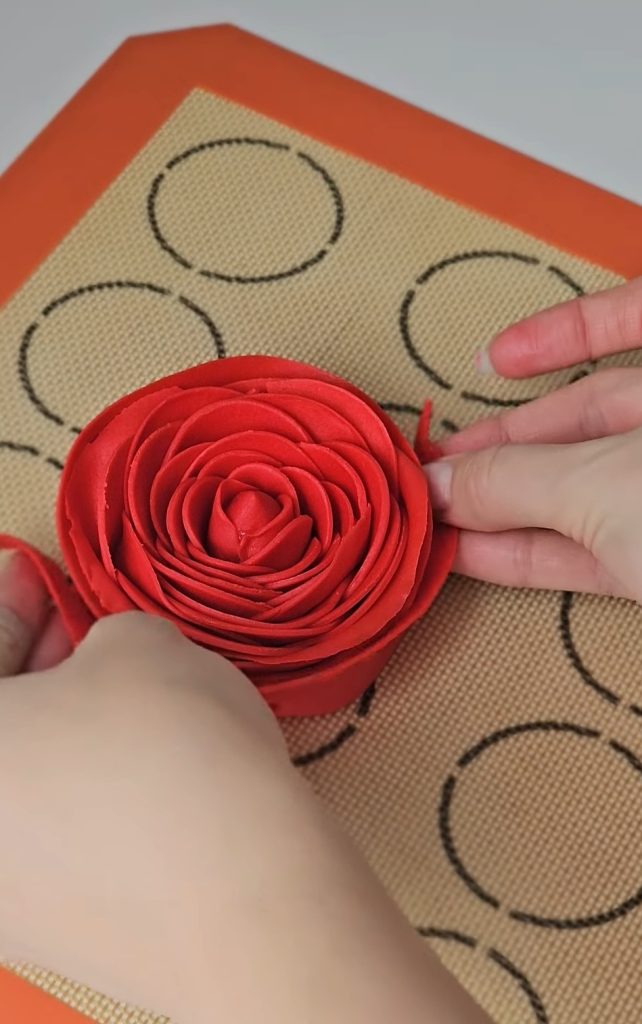
Building the Rose Bigger
- Cut several medium circles.
- Attach them one by one:
- Glue only the bottom.
- Leave the top loose.
- Slightly bend the edge outward with your finger.
Keep Adding Layers
- Your rose will slowly open wider.
Place petals evenly around. - Tip: Rotate the flower so each row looks neat.
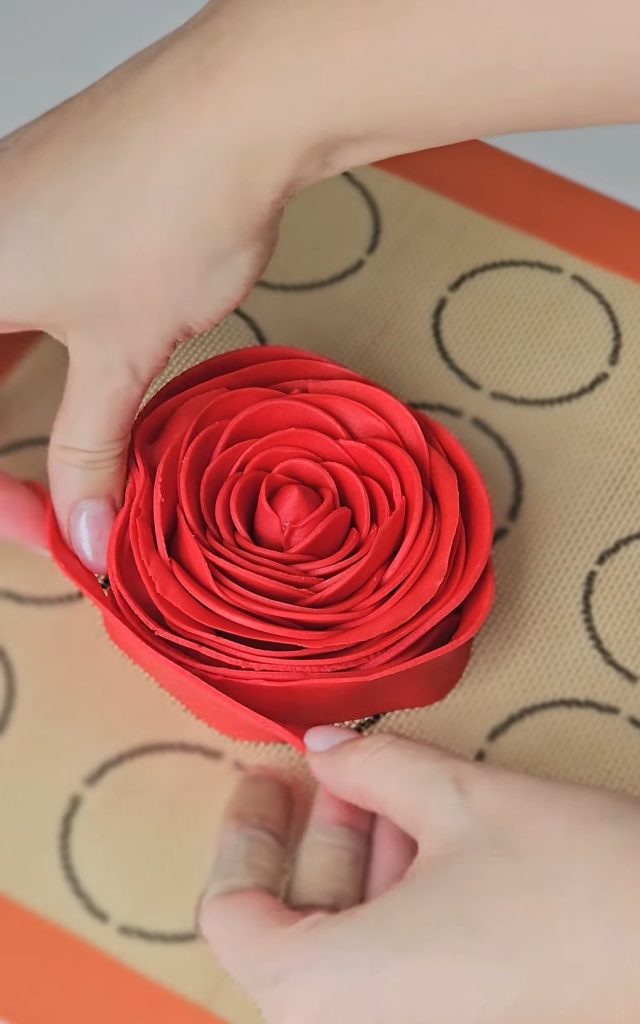
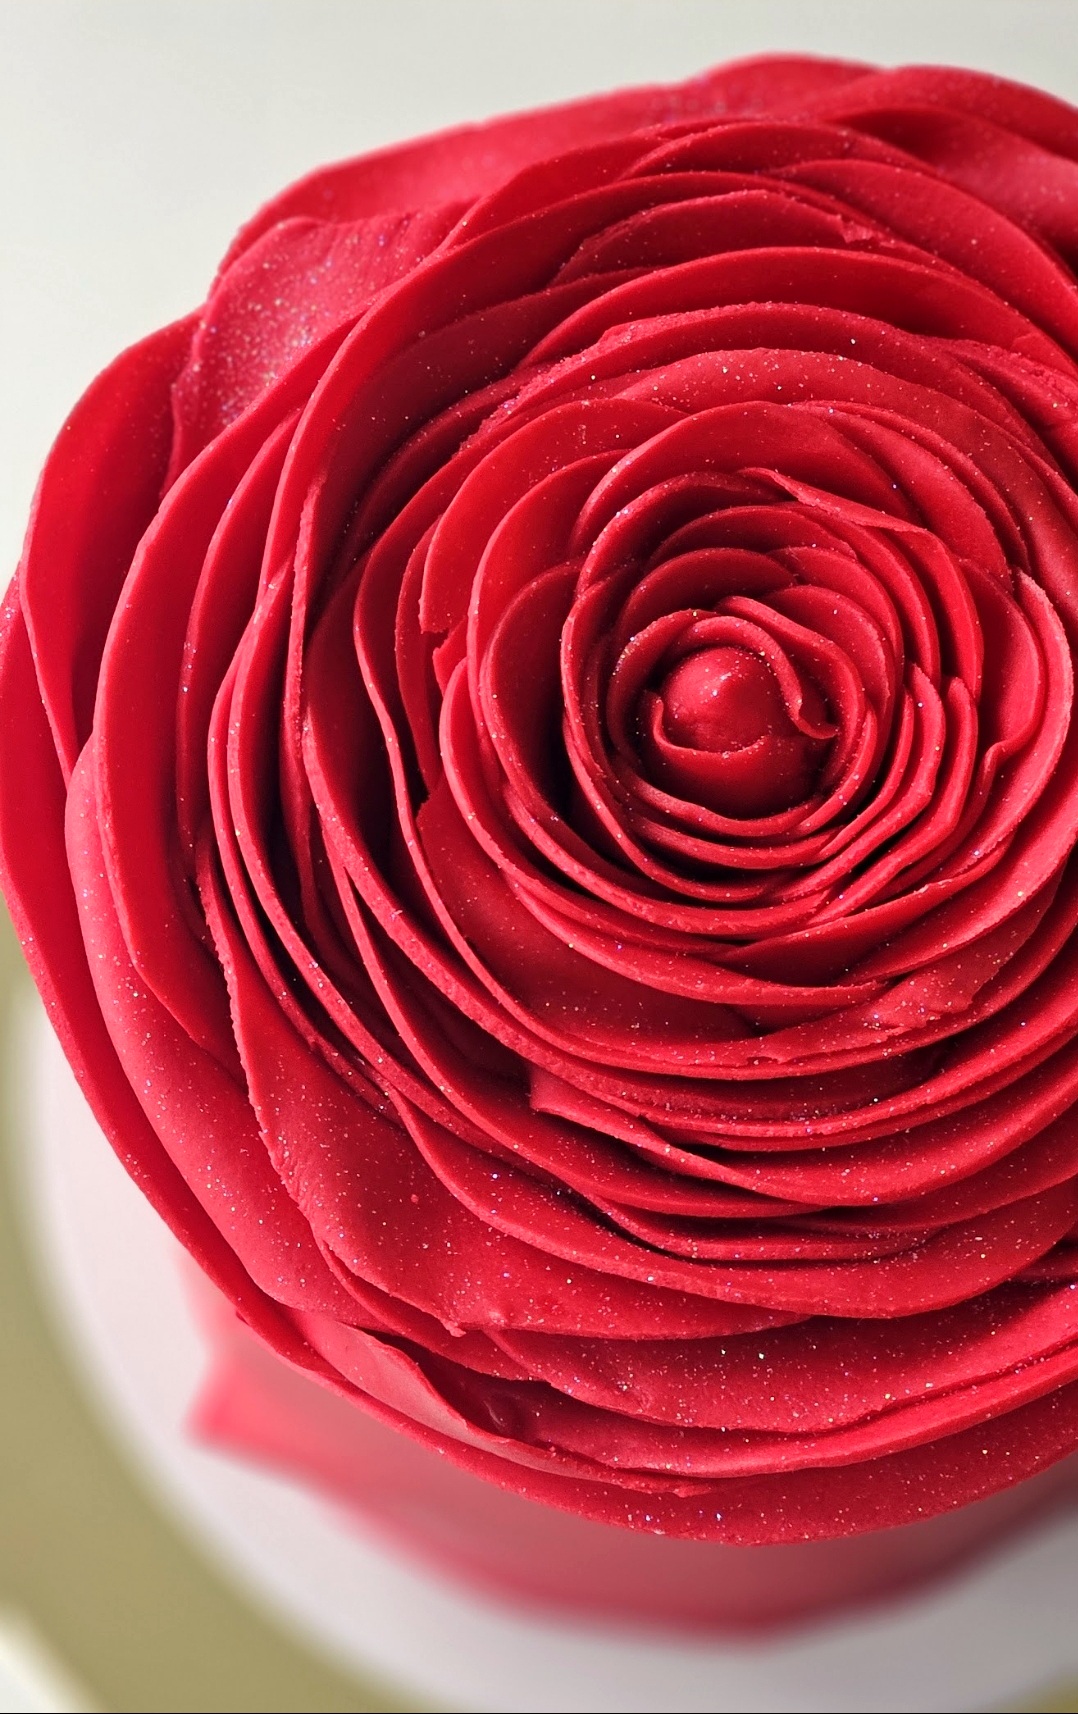
Cut Large Petals Yourself
- Roll the fondant thin again.
- Cut long petals with a knife:
- All the same height
- Slightly curved on the top
- Not too thick
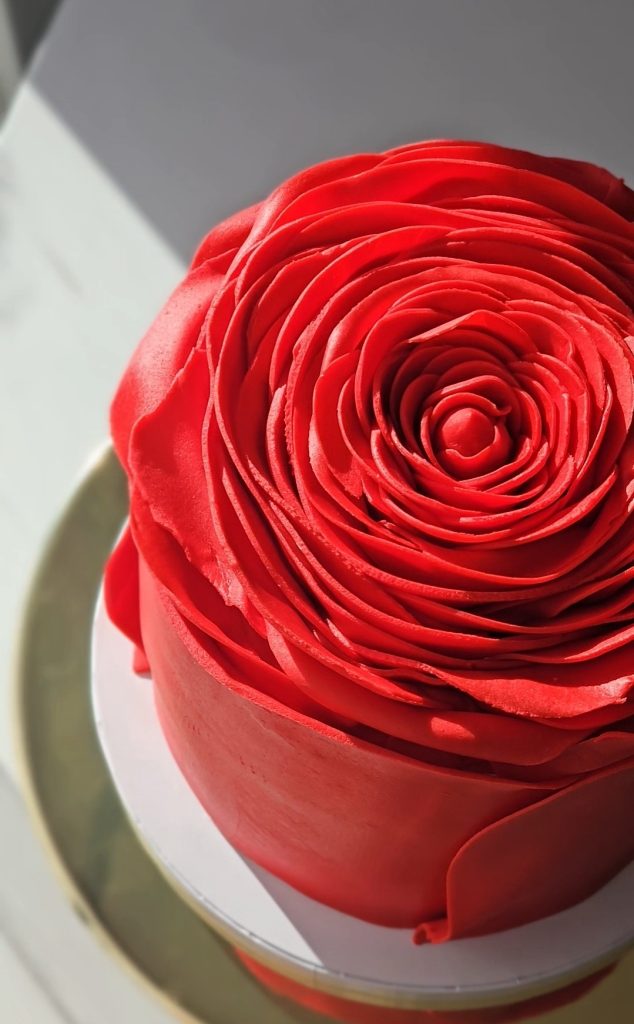
These petals make the rose big and round when looking from the top.
Prepare the Cake
Chill the Cake Before Placing the Rose
Put the frosted cake in the fridge for 15–30 minutes.
The cream should be firm so the rose sits safely.
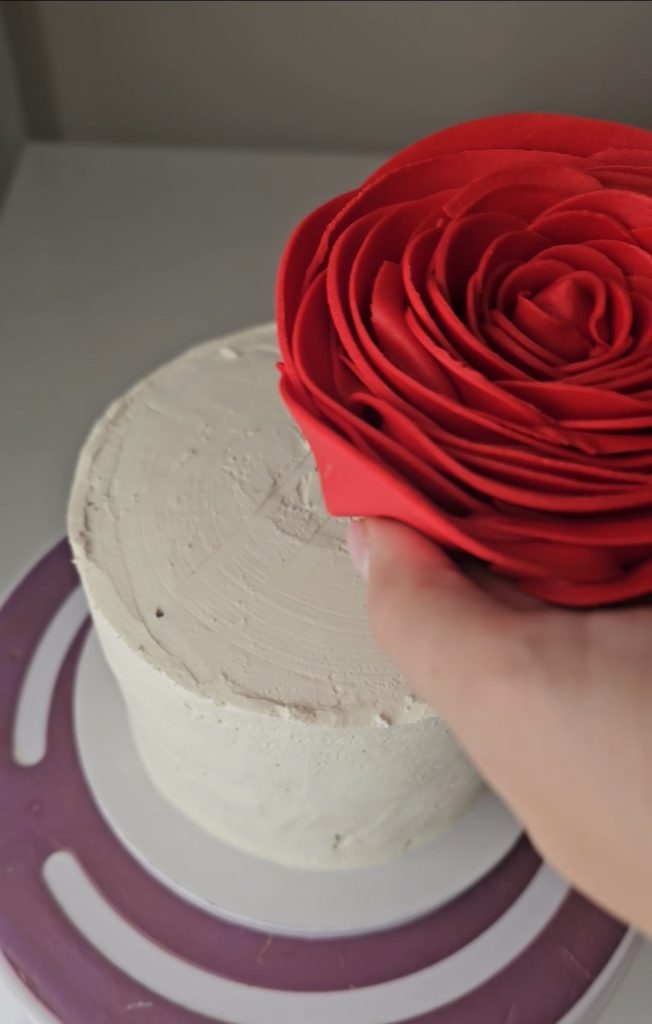
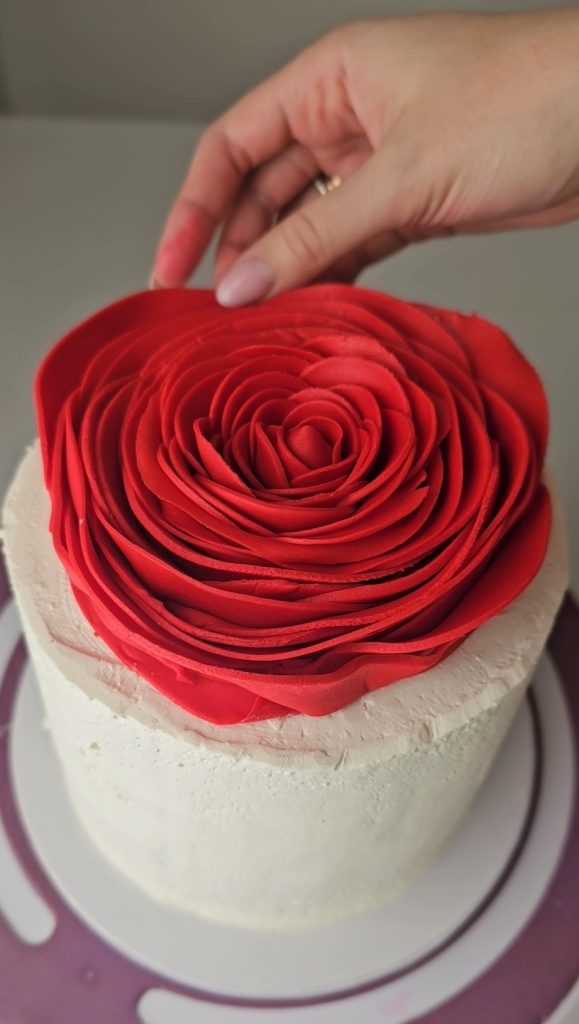
Place the Fondant Rose on Top
- Lift the rose with both hands and gently place it in the middle of the cake.
- Attach Large Petals and finish the rose
Tip:
Don’t press down hard. Just set it on top — the cold cream will hold it.
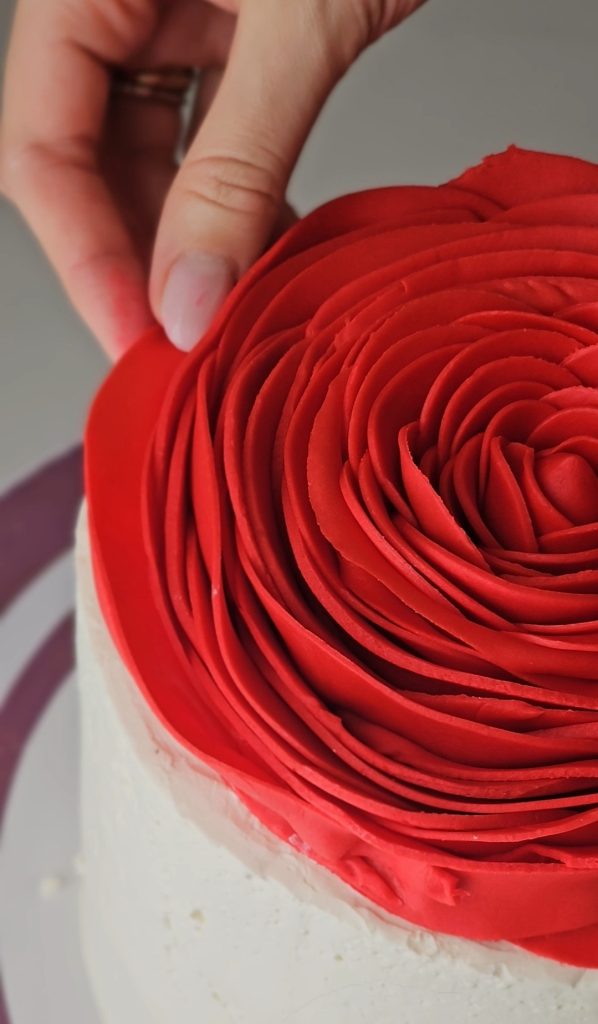
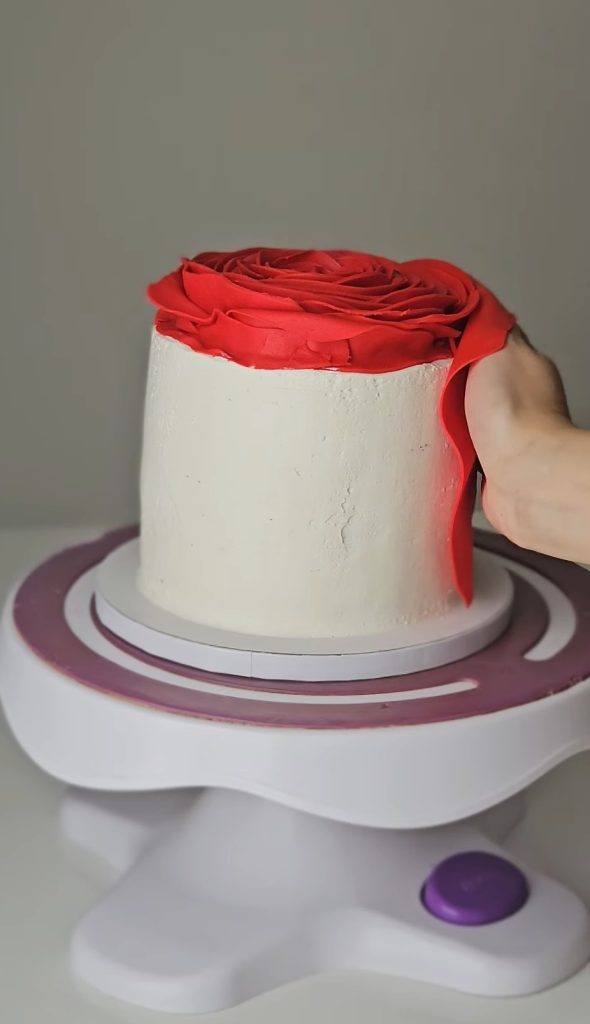
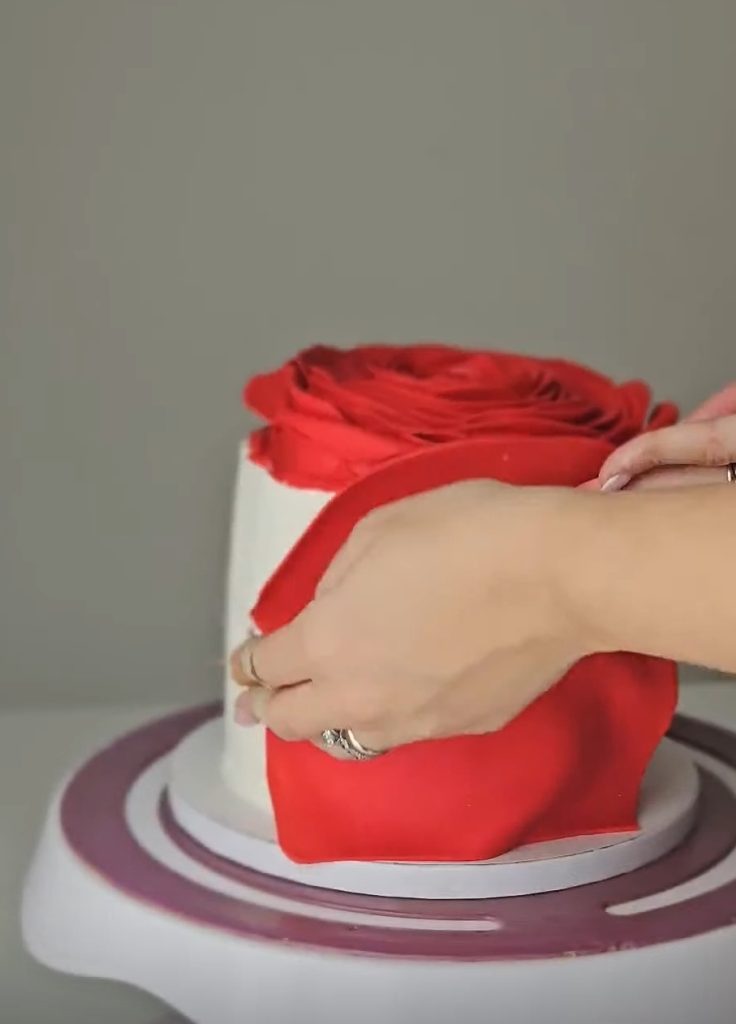
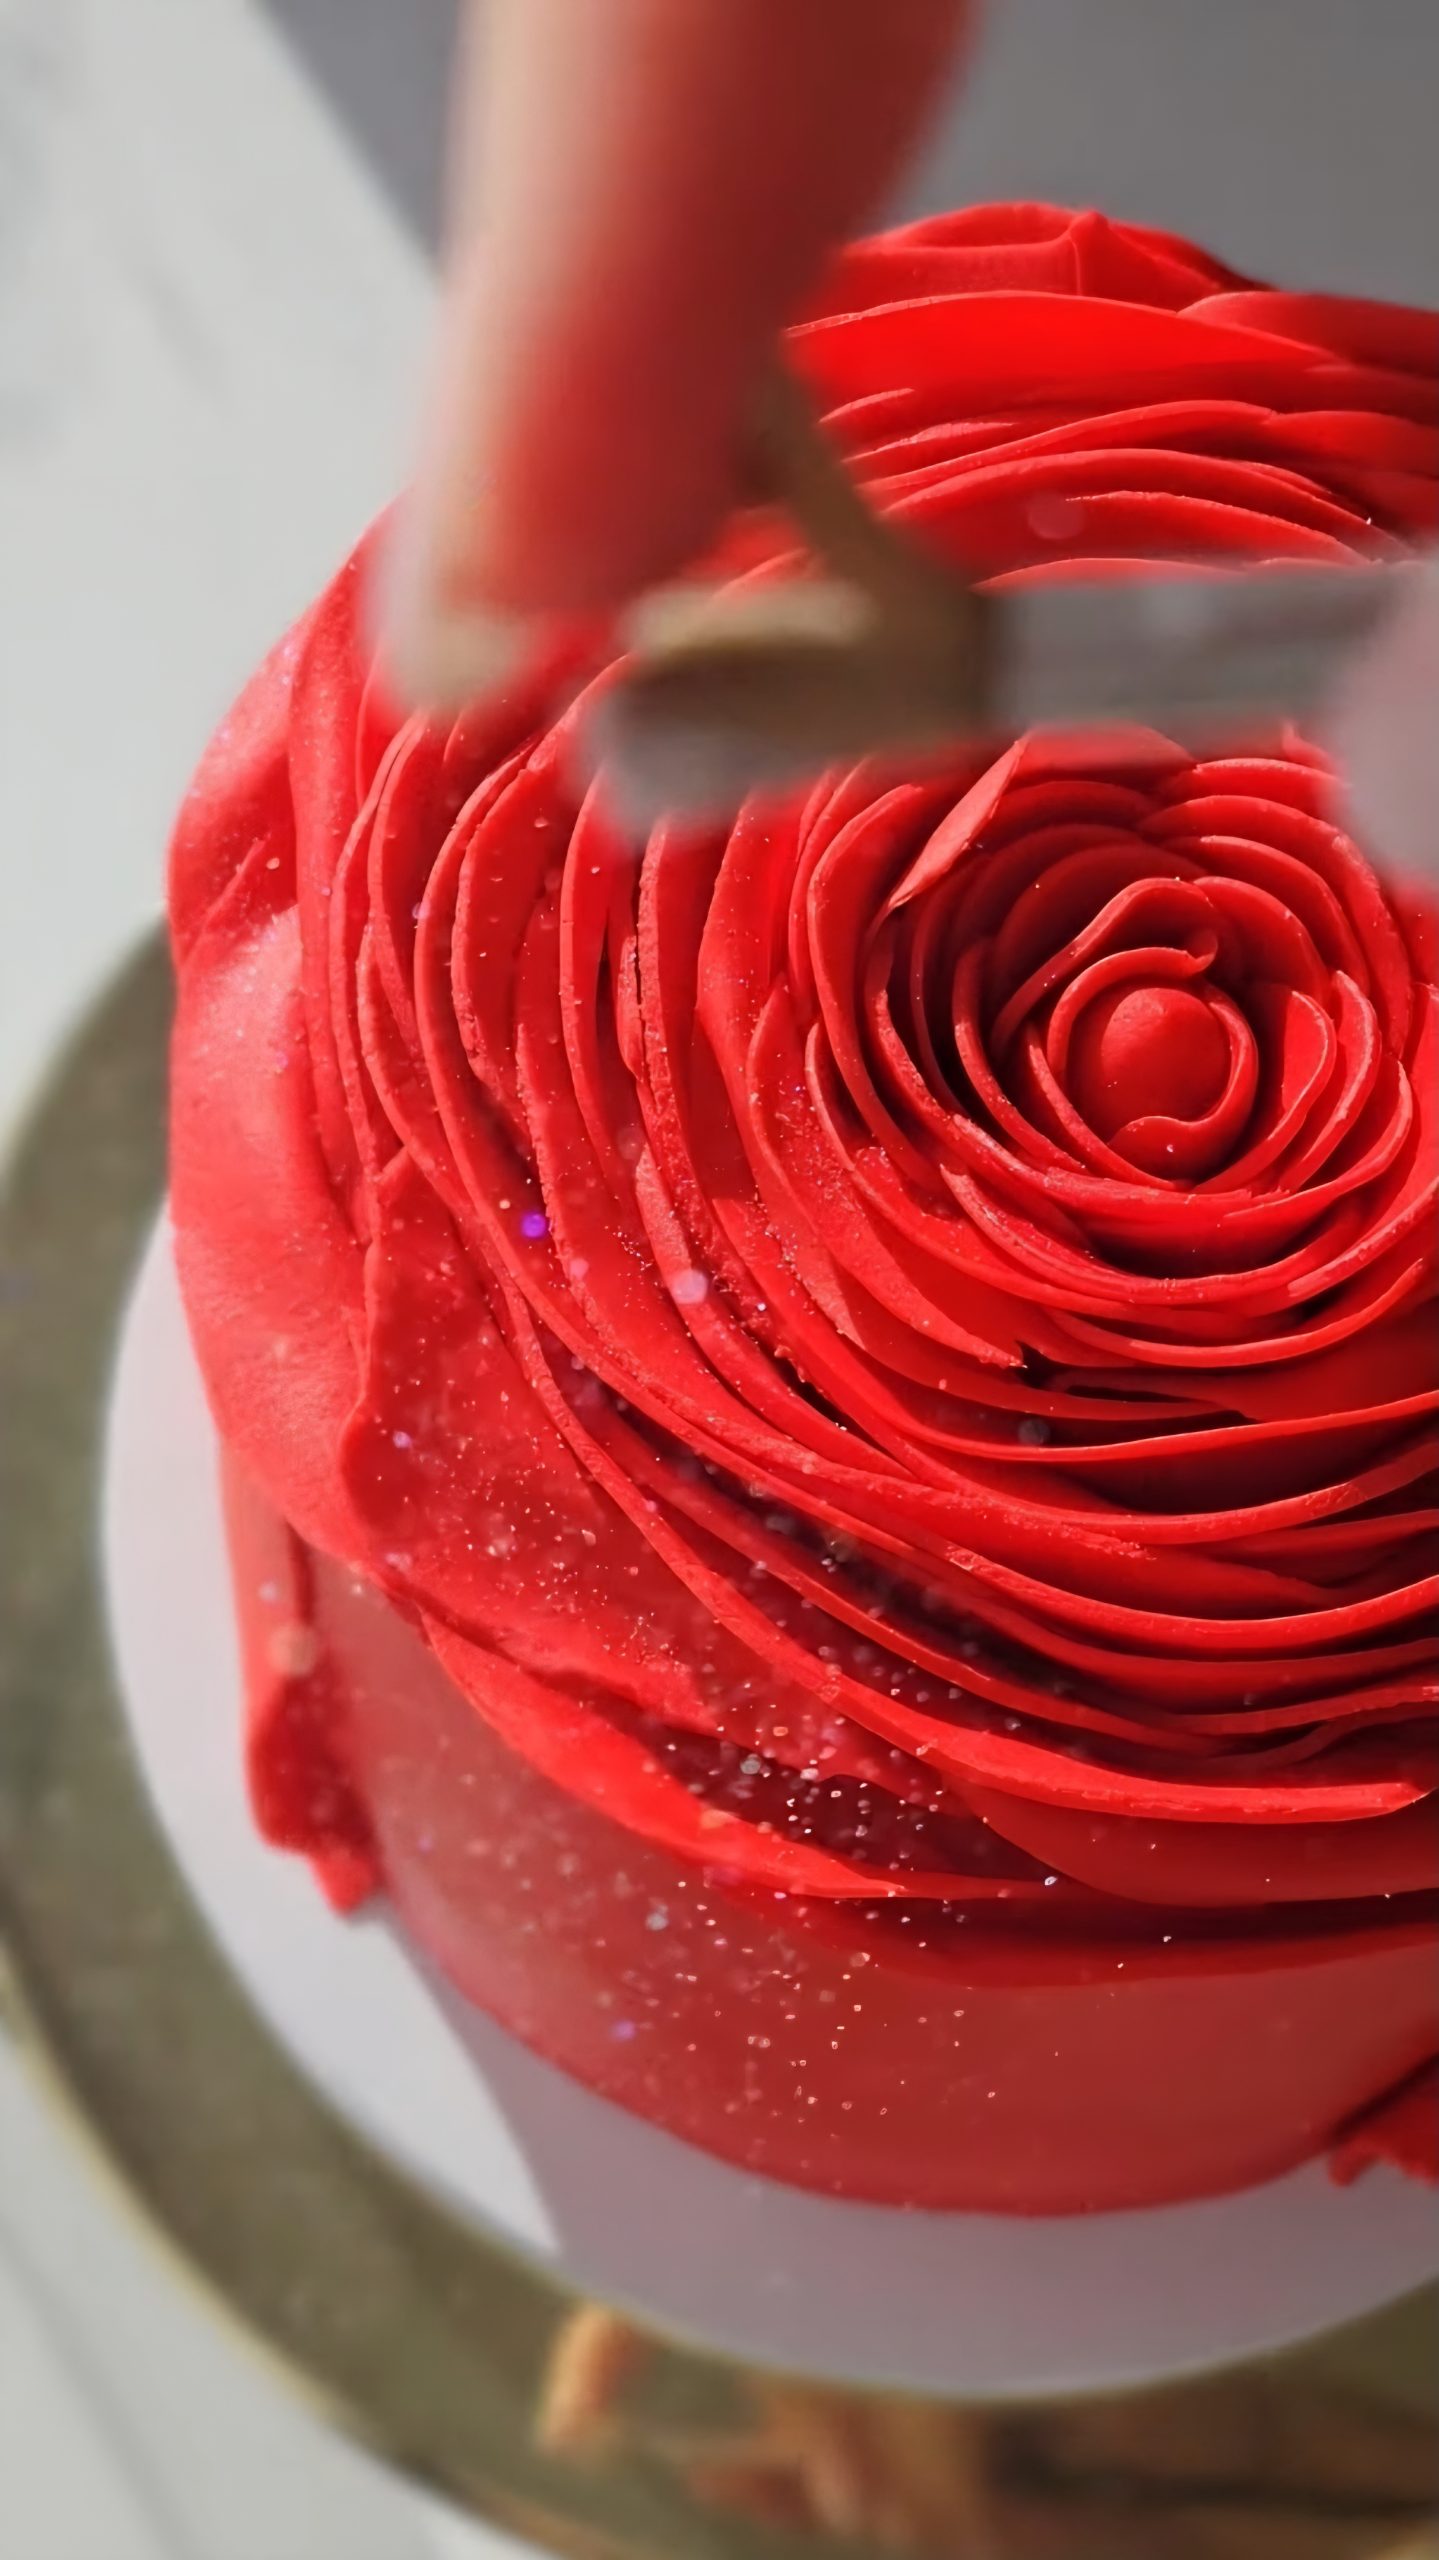
Wrapping the Cake With Fondant Petals
- Roll Out Fondant for the Side Wrap
- Roll a long, thin sheet of red fondant.
It should be:
- thin
- tall enough to cover the full height of your cake
- soft and flexible
Attach the Fondant to the Side
- Start at the back side of the cake.
- Gently place the fondant sheet against the cold cream and wrap it around the cake.
Tips:
- Use a little water only at the bottom if needed.
- Smooth with your hands slowly — don’t stretch the fondant too much.
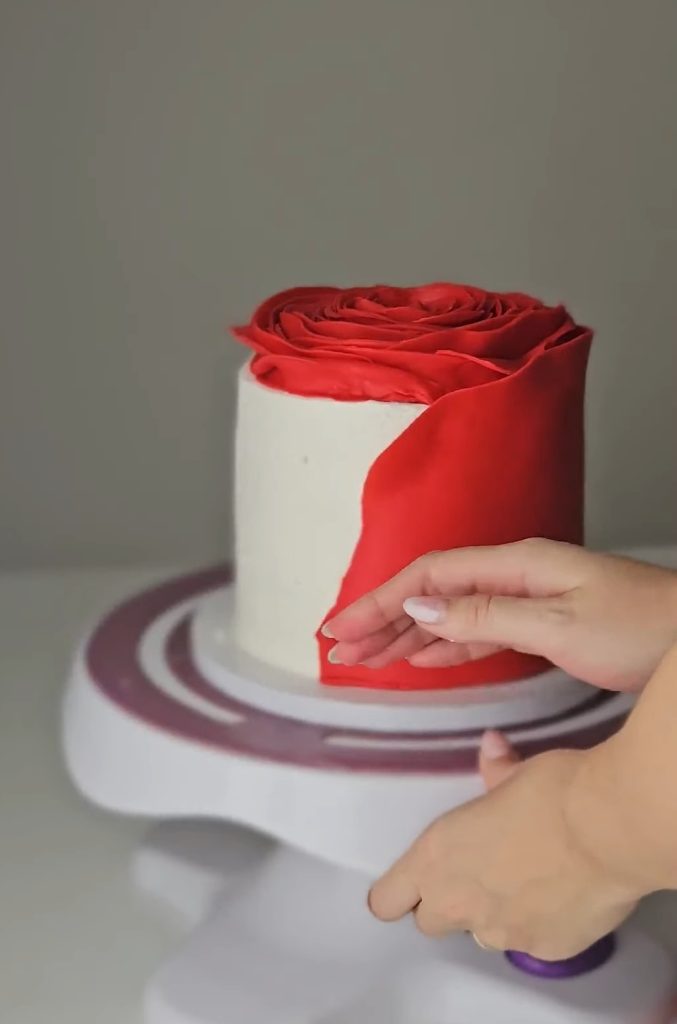
Adjust the Fondant and Create a Petal Look
- Pull the top edge slightly away from the cake so it looks like a real open petal.
- Let it fall naturally — this gives that soft romantic look.
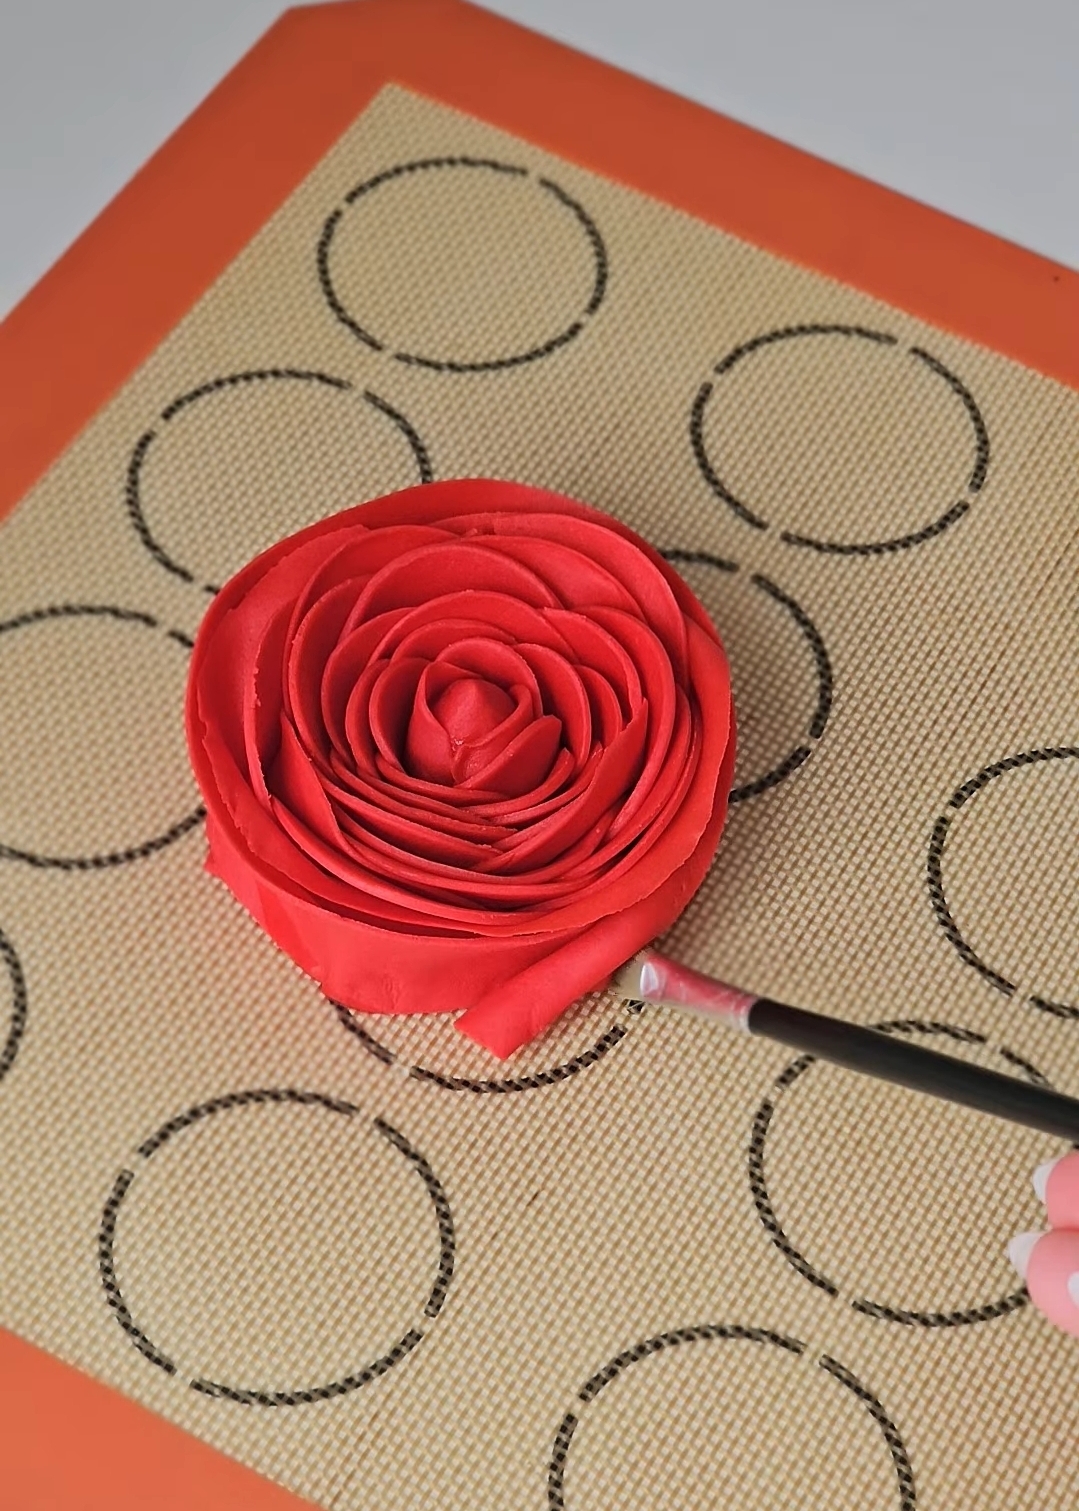
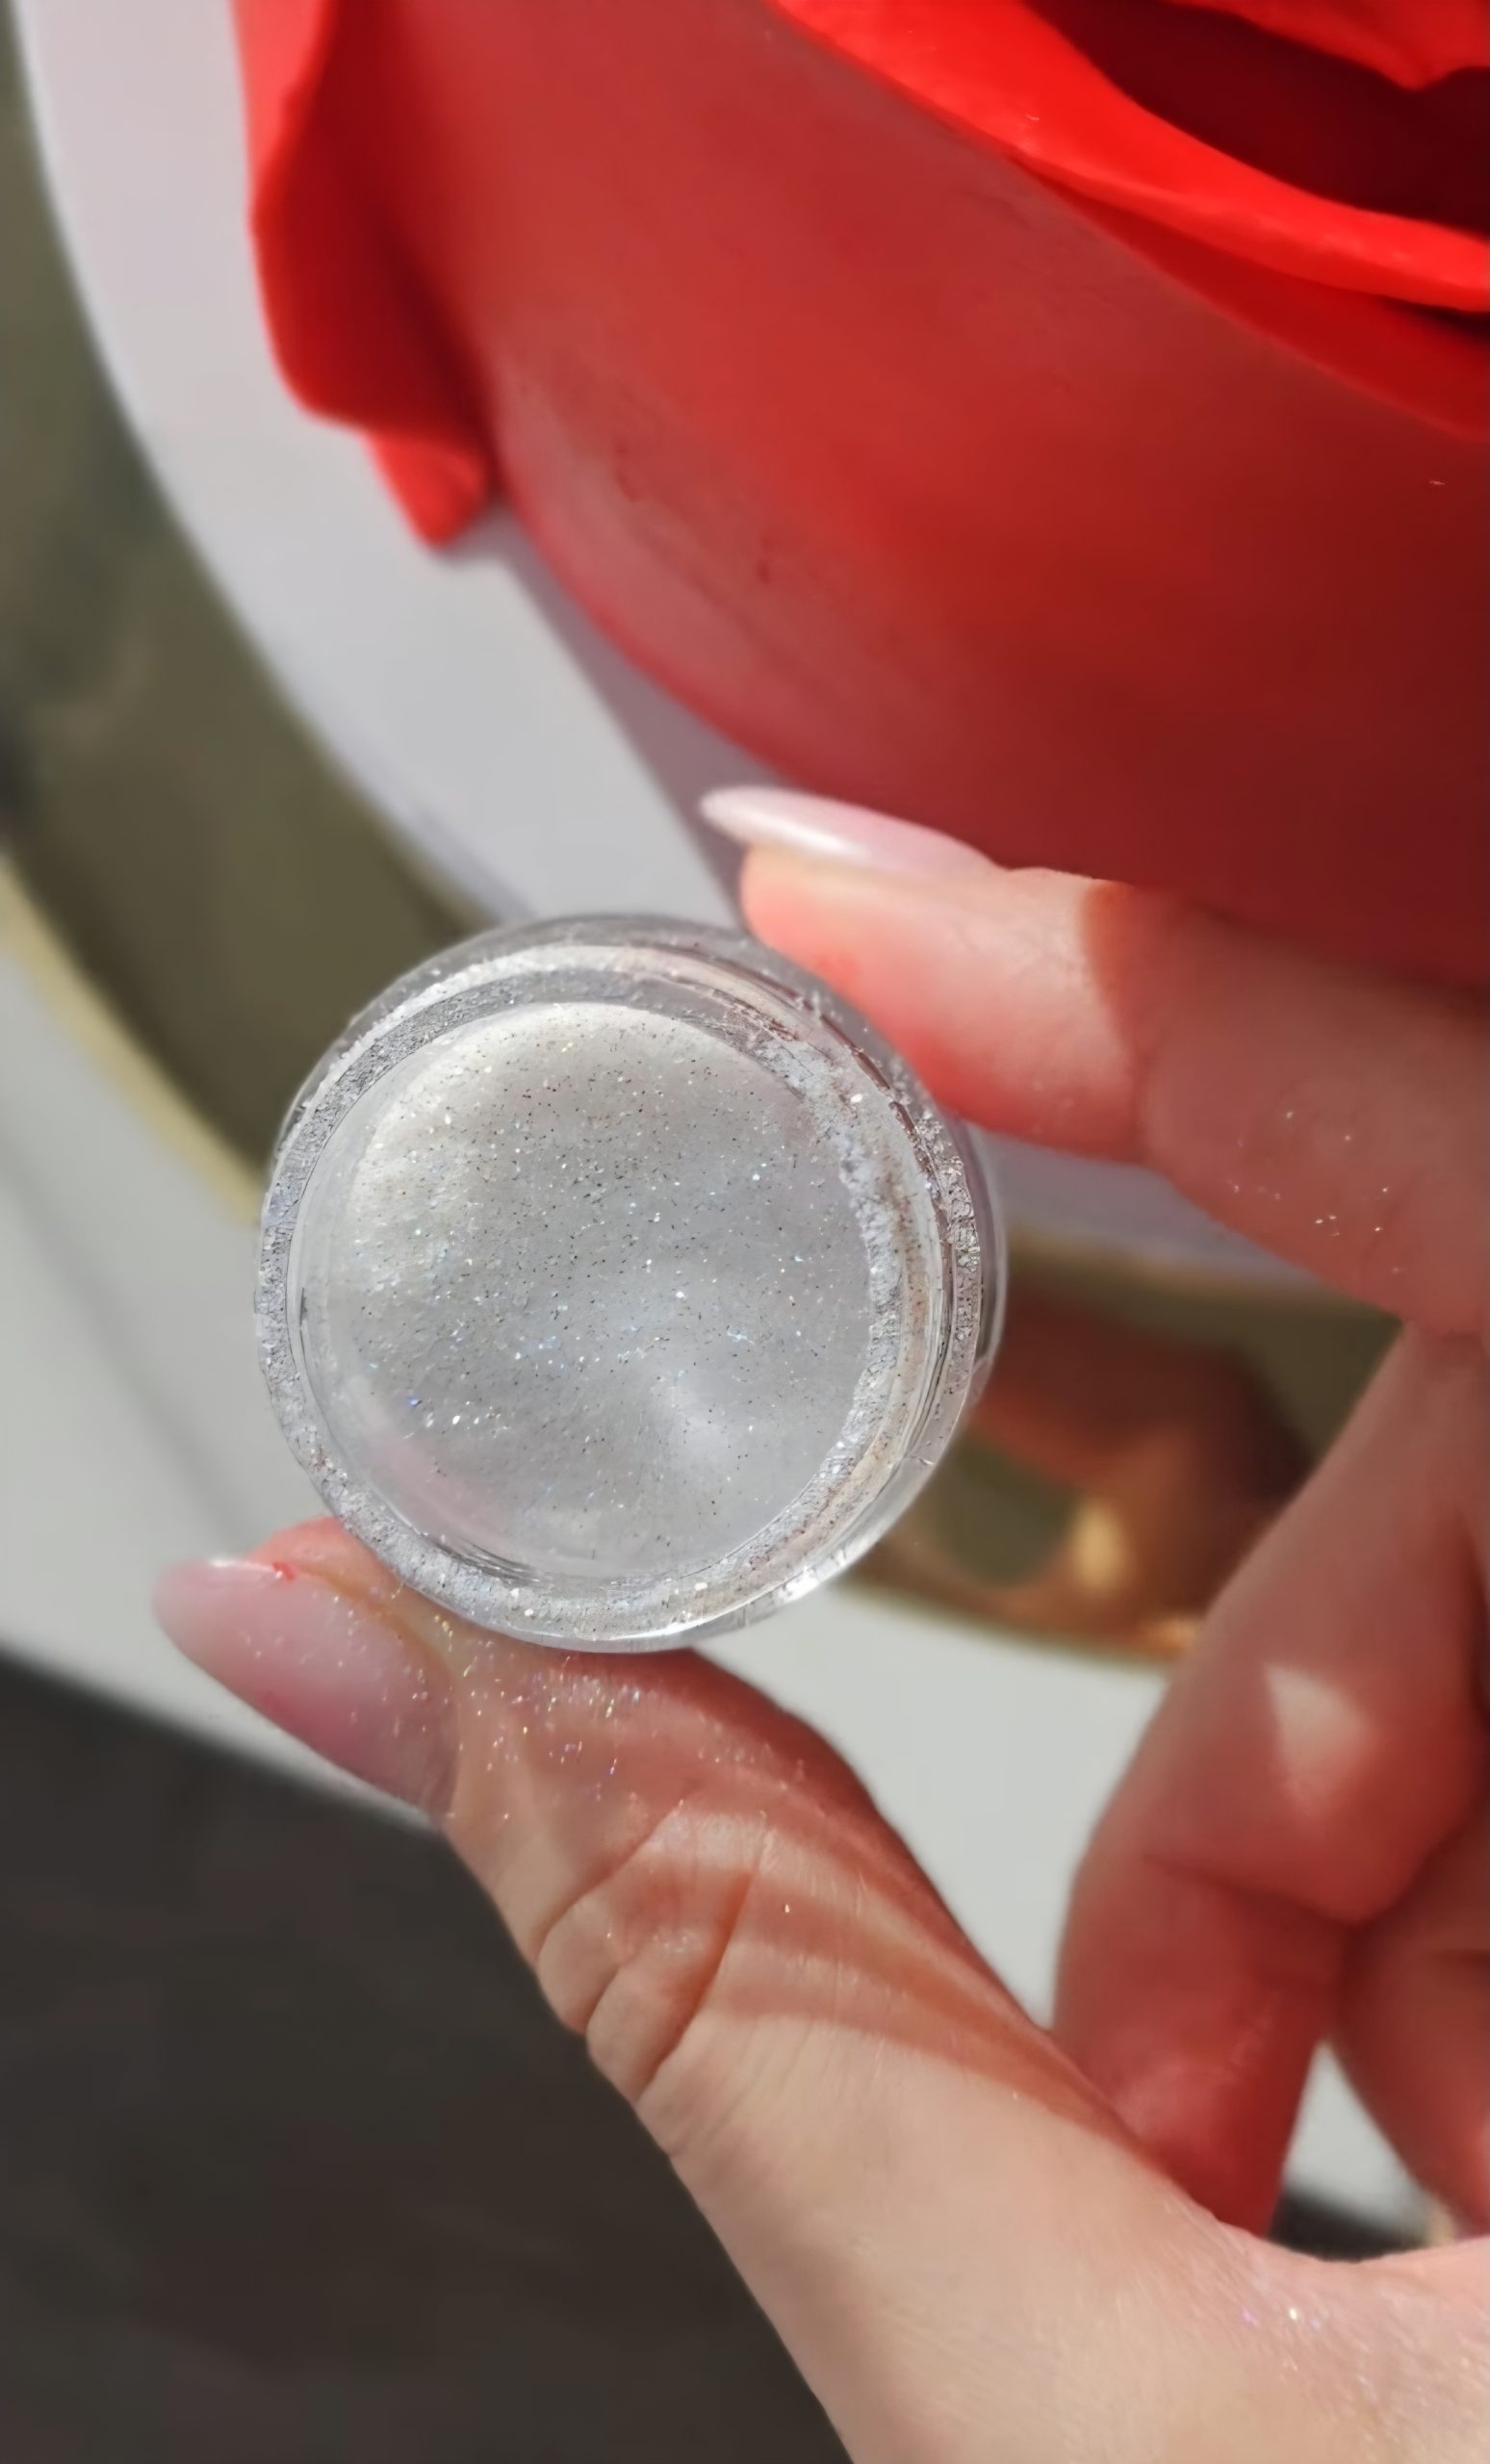
Use Edible Glitter or Luster Dust
- Dip a dry brush into edible silver/white glitter.
- Lightly Tap and Dust the Top of the Rose
- Gently shake or tap the brush over the top of the rose.
- This adds a soft, elegant shimmer.
Tip:
A little goes a long way — don’t cover too much.
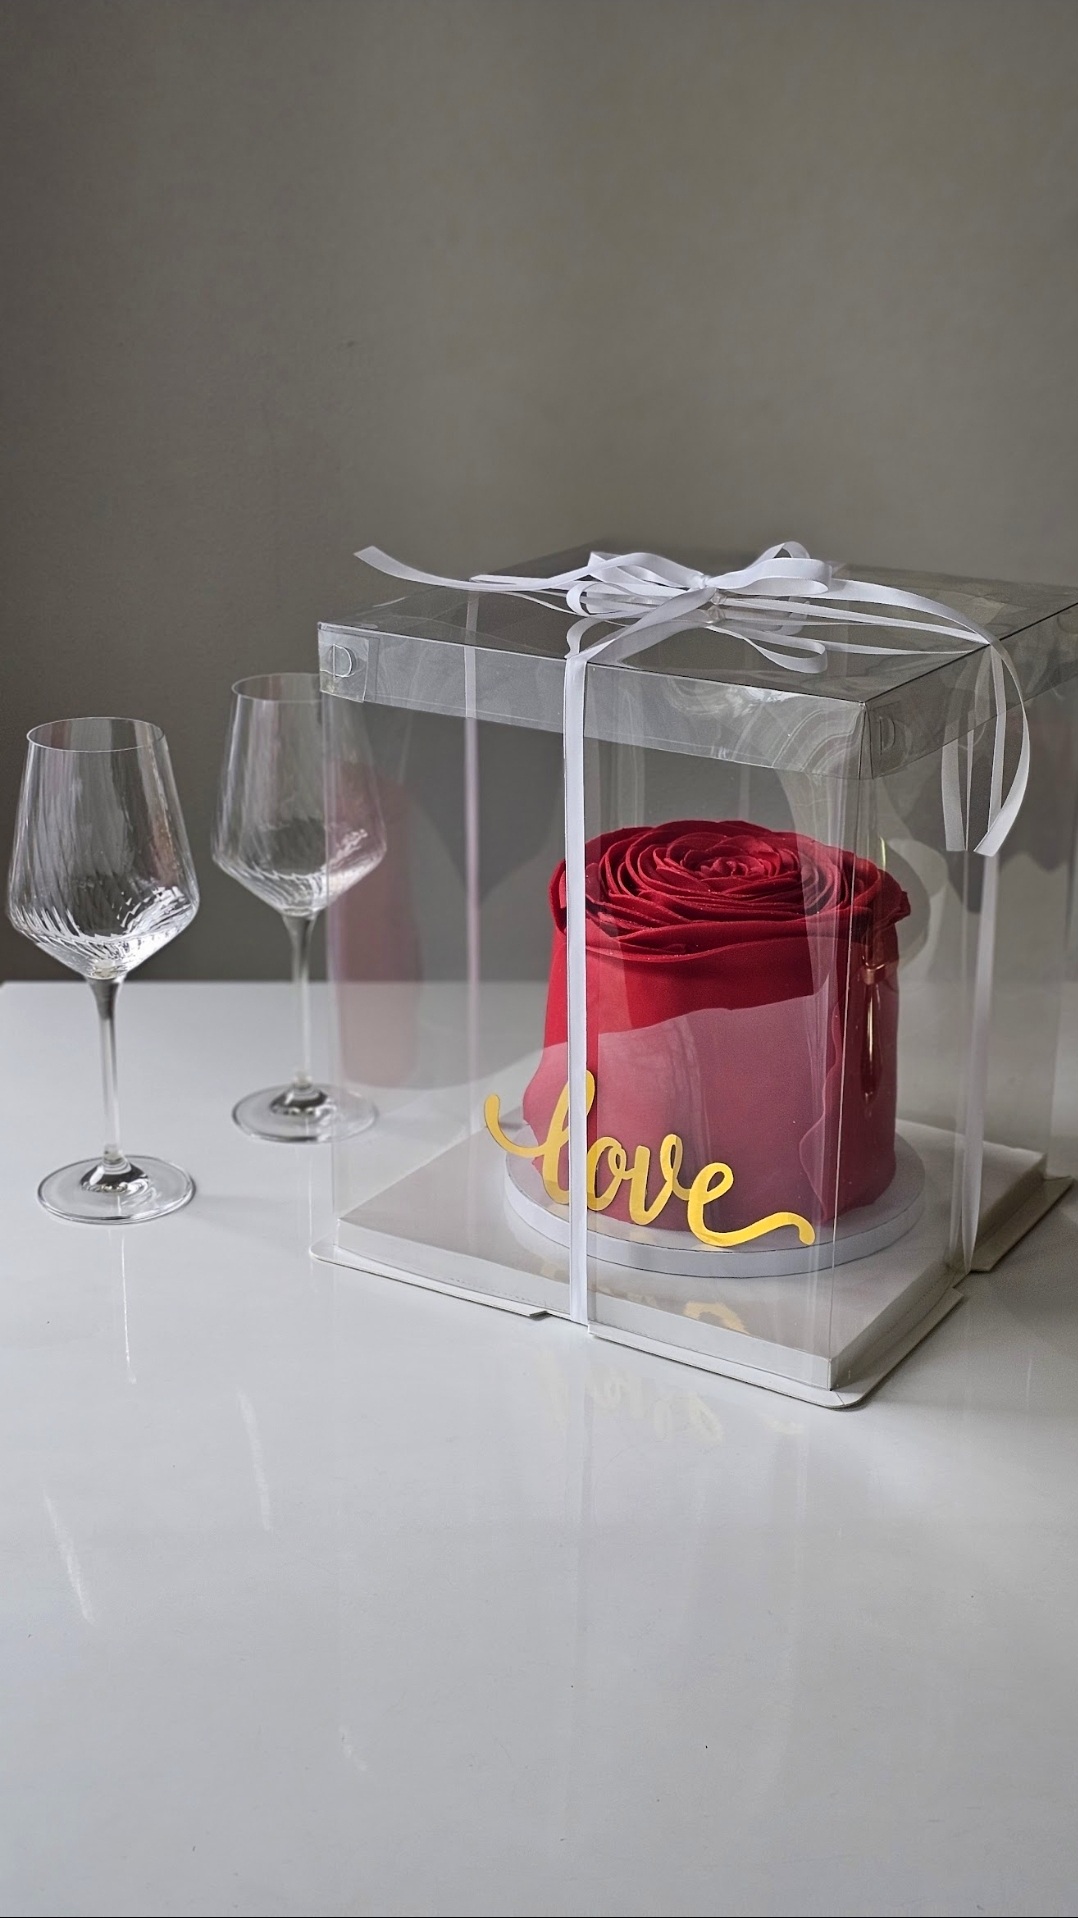
Packaging
Chill the Cake Before Packing
Place the cake in the fridge for 15-30 minutes so the fondant sets and holds its shape.
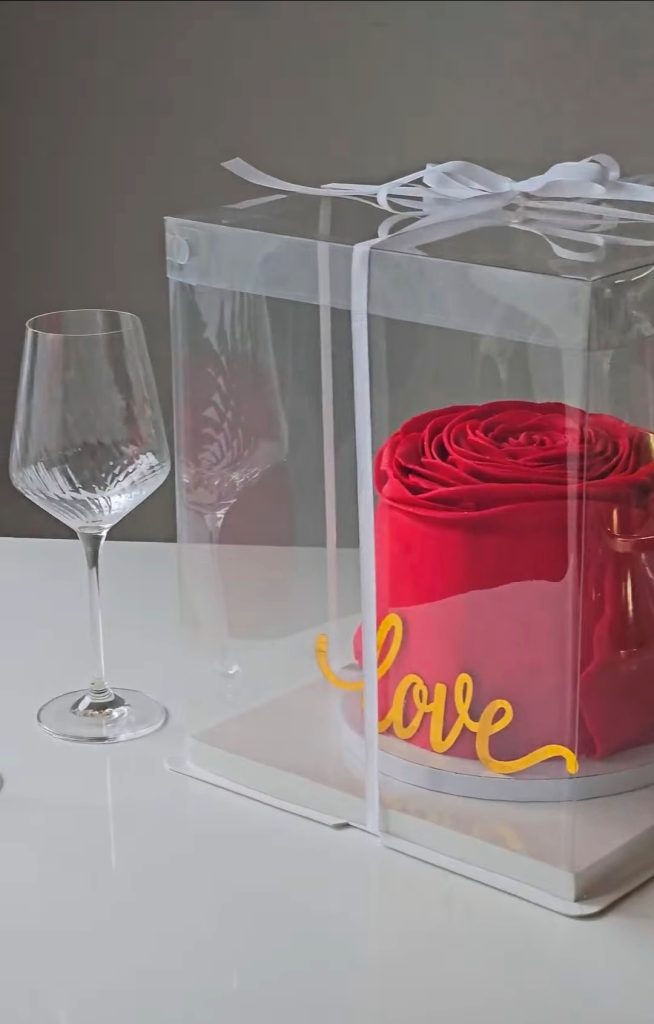
Place the Cake in a Clear Gift Box
- Use a tall clear box.
- Set the cake on a cake board and slide it inside carefully.
Add Ribbon and Decorations
Tie a pretty bow and add a “Love” or custom topper outside the box.
Now the cake looks like a luxury gift.

Cakes recipes:

Thanks for reading!
If this recipe inspired you, save it, share it, and tag me — I love seeing your creations!
NATALIA